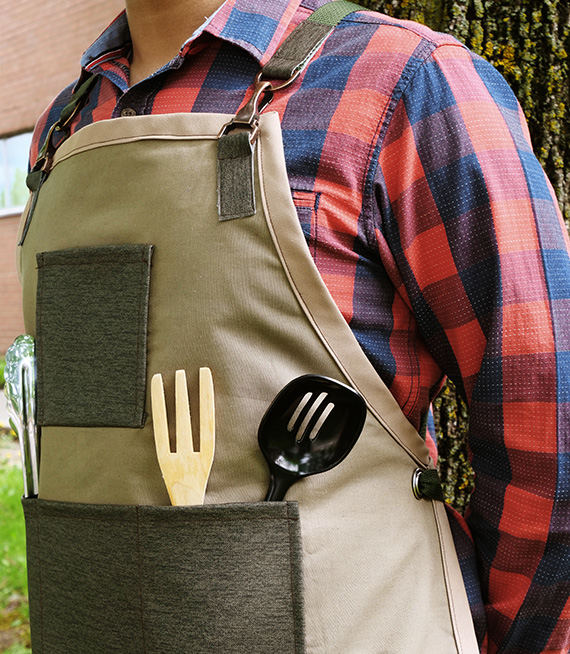
Outdoor Apron


e e
e

Create an apron for grilling and smoking outdoors! Customize your apron by choosing your favourite fabrics or unique trim and hardware combinations! This apron is designed for an adult man, but can be worn by anyone!


*Please share your creations on Facebook & Instagram. Tag Fabricland at @fabricland.canada or use the hashtag #fabriclandlove


Tips before you start

  • It’s a good idea to pre-wash and press natural fibre fabrics before you start, because they will shrink and wrinkle.
  • Try sewing on a scrap piece of fabric before sewing your project pieces. Adjust your tension, stitch length, and needle type accordingly.
  • Make the project out of a less expensive fabric first to fit. If you would like a biggger fit ajust the drafting measurements. You can also hold the paper pattern up to the person who willl wear the apron.
  • You can use regular paper taped to create a sheet big enough for you to draw your pattern on as a substitute to pattern paper.

Fabric Recommendations

Medium to Heavy Weight Fabric

  • Heavy Cotton Canvas Solids
  • Outdoor Upholstery Fabrics
  • Lightweight Vinyl
Instructions

Step 1: Cut and Prep all fabric

b

a. With pattern paper (or substitute) make a vertical 20" (50.8cm) straight line with a ruler.

Mark: “Centre” and “Fold Line”.

At the top of the line mark “Top Centre” and at the bottom of the line mark “Bottom Centre”. b.


b

b. At the Top Centre measure 5.5" (14cm) horizontally and mark with a dot. Mark: (B dot)


b

c. Measure 10" (25cm) from the Top Centre mark a dot. Then measure horizontally 12" (30.5cm) and mark a dot.Mark: (C dot)


b

d. With a curved ruler connect the B and C dot.


b

e. From the Bottom Centre measure 12" (30.5cm) horizontally and mark a dot.Mark: (E dot)


b

f. Connect E dot and C dot with a straight ruler.


Note: These measurements are a general suggestion. Every body type is different so it is recommended to play with the measurements and create samples to find what works best for you.

x

Step 2: Choose your own style: Draw the apron hem

Decide if you would like a rounded (curved ruler) or straight (straight ruler) hem on the apron. Connect the Bottom Centre to the E dot with the appropriate ruler for the finish you’d like.

Mark: “Apron Block” “Cut 2”

x
x

Step 3: Draft the pattern for the Back Strap Diamond

Make a cross shape by drawing a 5" (13cm) vertical line and a 5" (13cm) horizontal line overlapping in the centre. Connect the tips of each line with the a curved ruler.

Mark: “Vinyl Back Strap Diamond” “Cut 4”

x
x

Step 4: Draft the pattern for the pockets

The pockets can look good many different ways, but for this project we will be making a wide pocket and a small pocket.

To create the longer bottom pocket, draw a rectangle to the dimensions of 7.5" (19cm) horizontally and 8" (20.5cm) vertically.

Mark: “Bottom Pocket”.

Mark: “Cut On Fold” on the horizontal line.


To create the smaller top pocket, draw a rectangle to the dimensions of 5" (12.7cm) horizontally and 6" (15.25) vertically.

Mark: “Top Pocket”.

Step 5: Draft the Strap Vinyl Cover

Draw a 1" x 5" (2.5cm x 12.7cm) rectangle.

Mark this piece: “Vinyl Strap Cover” “Cut 6”.

x
x
x

Step 6: Cut pattern out of fabric

Pin the pattern pieces to the fabric. If using vinyl mark on the vinyl, with chalk around the pattern piece or simply weight down the pattern piece and cut the fabric out with a rotary blade. Cut the belting/webbing length in half. Burn both ends of the belting/webbing to stop fraying.


Note: When working with directional prints carefully plan where you are placing the pattern before cutting.

x
x
x

Step 6: Cut pattern out of fabric

Take 2 pieces and sew a 5/8" seam allowance around the diamond with right sides together and leave a 1" (2.5cm) opening.

Clip the corners, turn inside out and topstitch around the edges. Repeat this with the other 2 pieces.


Add a snap 1/4" (6mm) below each corner of the back strap diamond pattern piece. On a different diamond add the coordinating snap.

This back strap diamond will help to keep the belting straps structure.

x
x
x
x
x
x

Step 8: Pockets

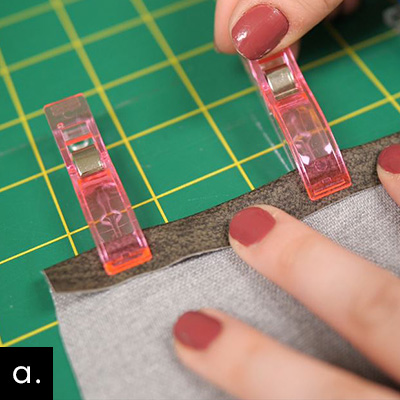
a. On both the Top Pocket and Bottom Pocket, iron or clip the sides 1/4" (0.6cm) in, wrong sides together.


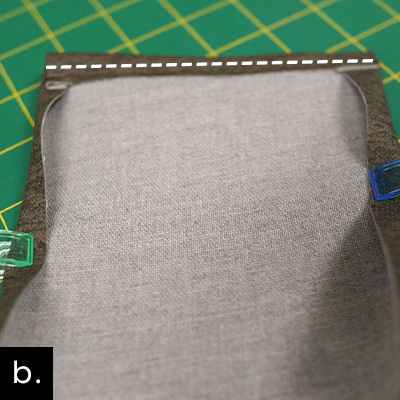
b. Finish the top of both pockets by folding the 1/2" (1.25cm) seam allowance down and sewing straight across.


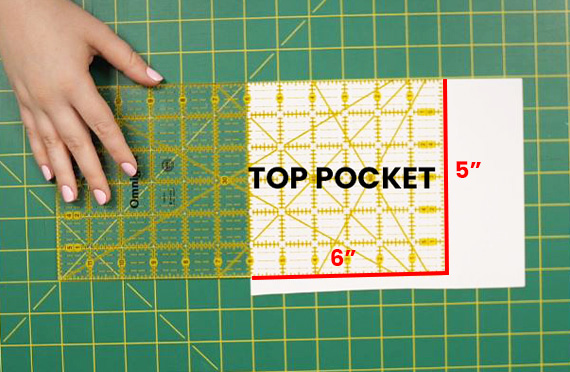
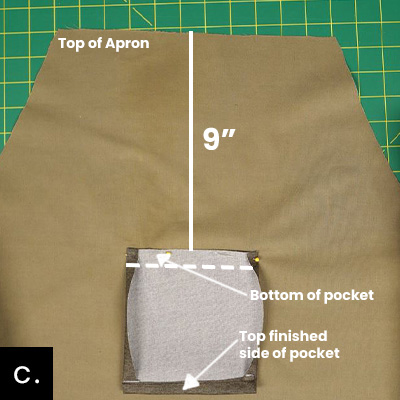
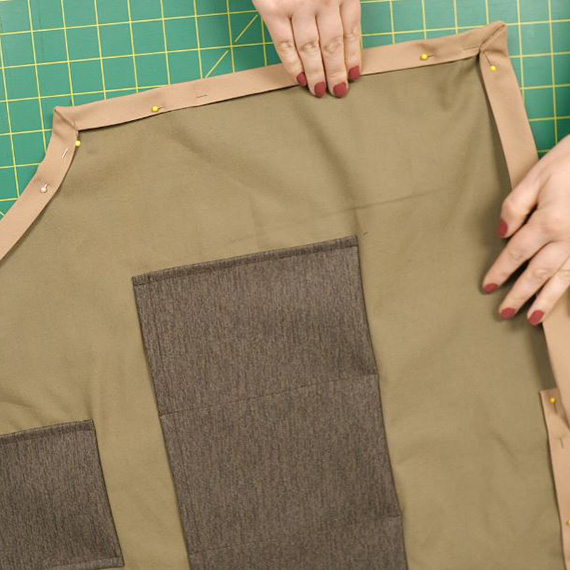
c. Take one of the apron pieces (the second cut apron piece will be used later and act as a backing so that seams won't show through) and measure 9" (23cm) below the top centre. Place the Top Pocket down, right sides together, with the apron piece. Make sure that the finished side of the pocket is facing towards the hem.


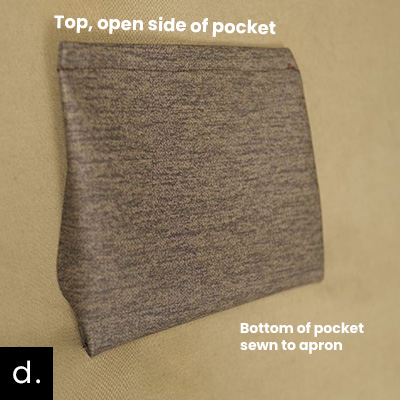
d. Sew the bottom of the pocket across and backstitch on both sides. Flip the pocket so the wrong side of the pocket is facing the right side of the apron.


e. Sew along each side of the pocket and backstitch at the beginning and the end.


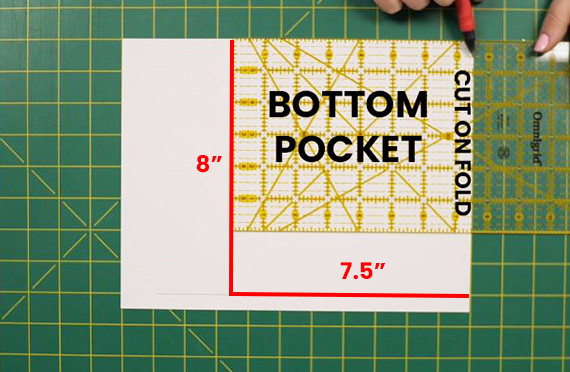
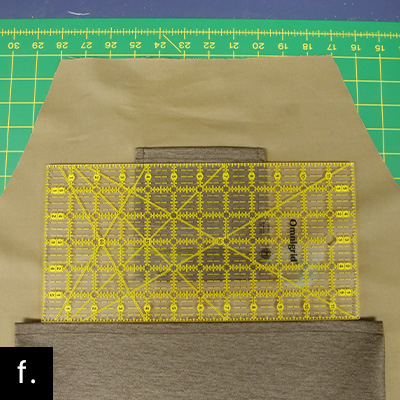
f. Repeat this step with the Bottom Pocket, but place the Bottom Pocket 10" (25.5cm) below the Top Pocket.


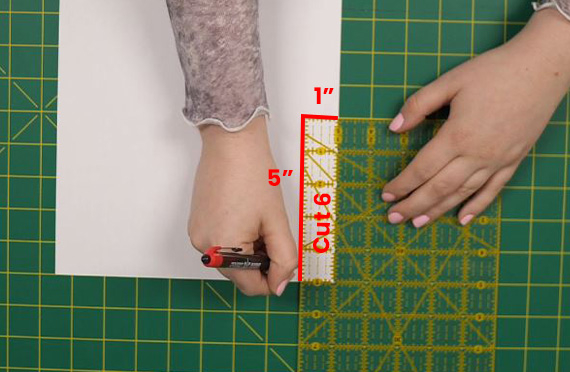
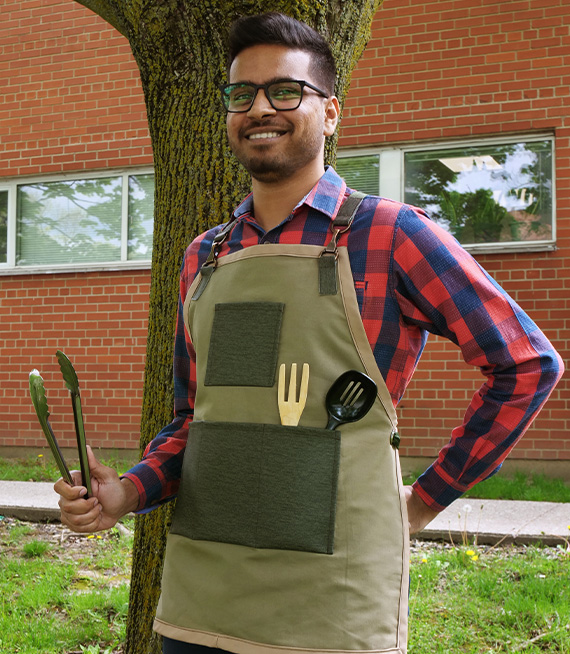
Optional: To divide the Bottom Pocket into 3 sections, measure and mark 4.5" (11.5cm) from each side edge. Mark and sew along the line. Remember to backstitch.

x
x

Step 9: Binding

Place the wrong sides of the apron together and pin the binding around the edge. Sew the binding onto the apron with a straight stitch or zigzag.


DIY option: To make the binding out of fabric instead of buying readymade bias tape. This DIY uses a 1” binding. You can decide what width you would like to create. Cut a long strip 100" (254cm) x (?) the width to cut is specified on your bias tape maker instructions (Most bias tape makers are sold with instructions in the package). Keep this measurement in mind when buying fabric for the binding.


Note: For more information on making bias tape visit fabricland.ca/howto/2023/bias-tape/

x

Step 10: Grommets

Lay the apron out and measure 3/4" (2cm) away from C dot on both sides and add a grommet.


Read the instructions provided inside the grommet package for details specifically for that grommet and tool.

x
x

Step 11: Attach the Hook

With one of the vinyl strap covers, weave the short side inside the edge of the hook and fold it in half, with raw ends facing away from the hook.

Measure 1" (2.5cm) away from B dot on the apron and place the hook's bottom bar there. Sew the vinyl to the apron fabric.

Repeat this step for the other side of the apron.

x
x

Step 12: Attach the belting to the D-Ring

With one of the vinyl strap covers, place the belting on the wrong side leaving 1" (2.5cm) of the vinyl exposed.

Weave the short side of the vinyl and strap through the D-Ring and fold it in half, with wrong sides together. The raw ends of the vinyl strap cover should be facing away from the D-ring.

Sew through the vinyl strap cover and belting to secure.

Repeat this step on the other side.

x
x

Step 13: Belting through the back strap

Feed the belting through the layers of the back strap diamond. (This can be done easily by undoing the snaps.)

Do this for both belting pieces. The straps should cross in the middle. Make sure the snaps are secure with the belting inside before advancing to the next step.


Note: Make sure that the belting is not twisted before feeding/placing it in the back strap.

x

Step 14: Feed the belting through the grommet

Next, feed the belting through the grommet. The grommet that the belting is fed through should be on the opposite side of the apron to where the belting started. This creates a criss-cross effect.


Do this for both belting strips.

x

Step 15: Finish the belting ends with the vinyl strap covers

With one of the vinyl strap covers, cover the end of the belting and sew around to secure. Do this for both belting ends.

x
x

Project completed

Enjoy your Outdoor Apron! You can mix and match with many different fabrics while using this design! Get creative!


Note: All products might not be available at all store locations. To find a suitable product alternative for your project, please ask a store team member for assistance.

More DIY Crafts

DIY of the month DIY of the month DIY of the month
Homepage

More DIY Crafts

Sales Slyer

Learn 'HowTo'

Sales Slyer

Sales Flyer

maple

PROUDLY CANADIAN

2024 © Fabricland - All Rights Reserved