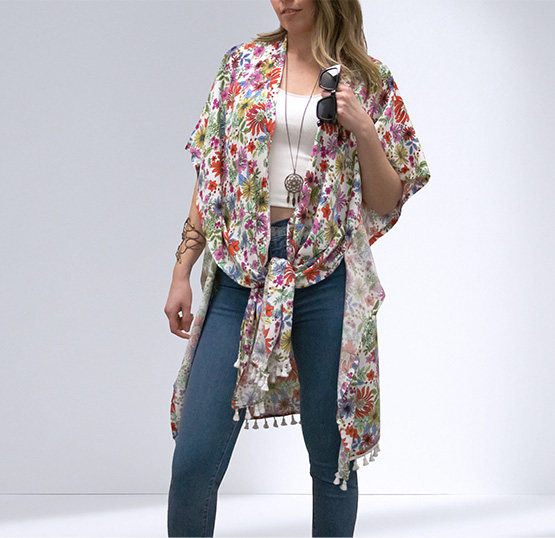
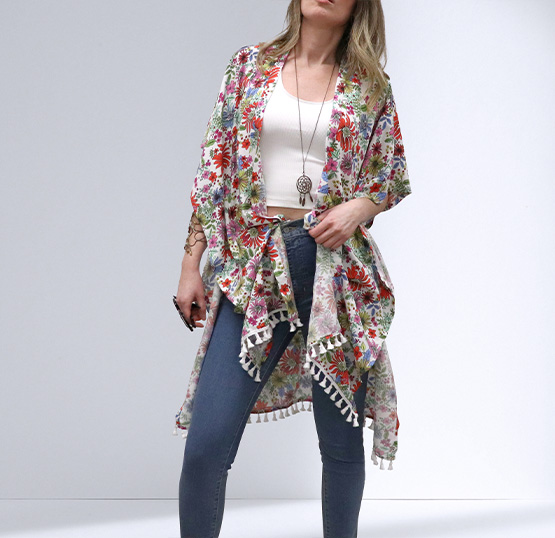
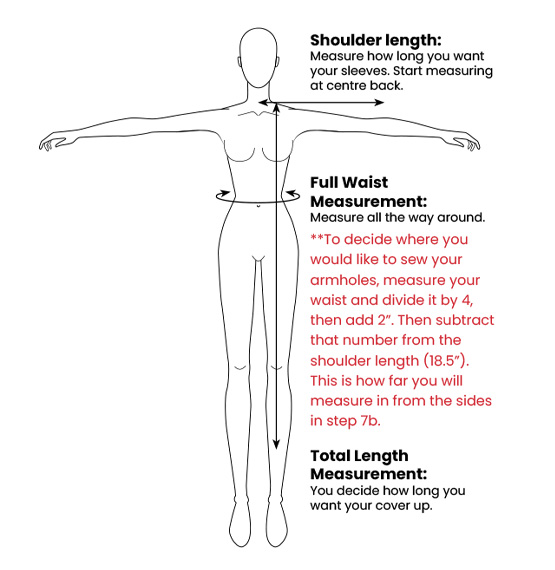
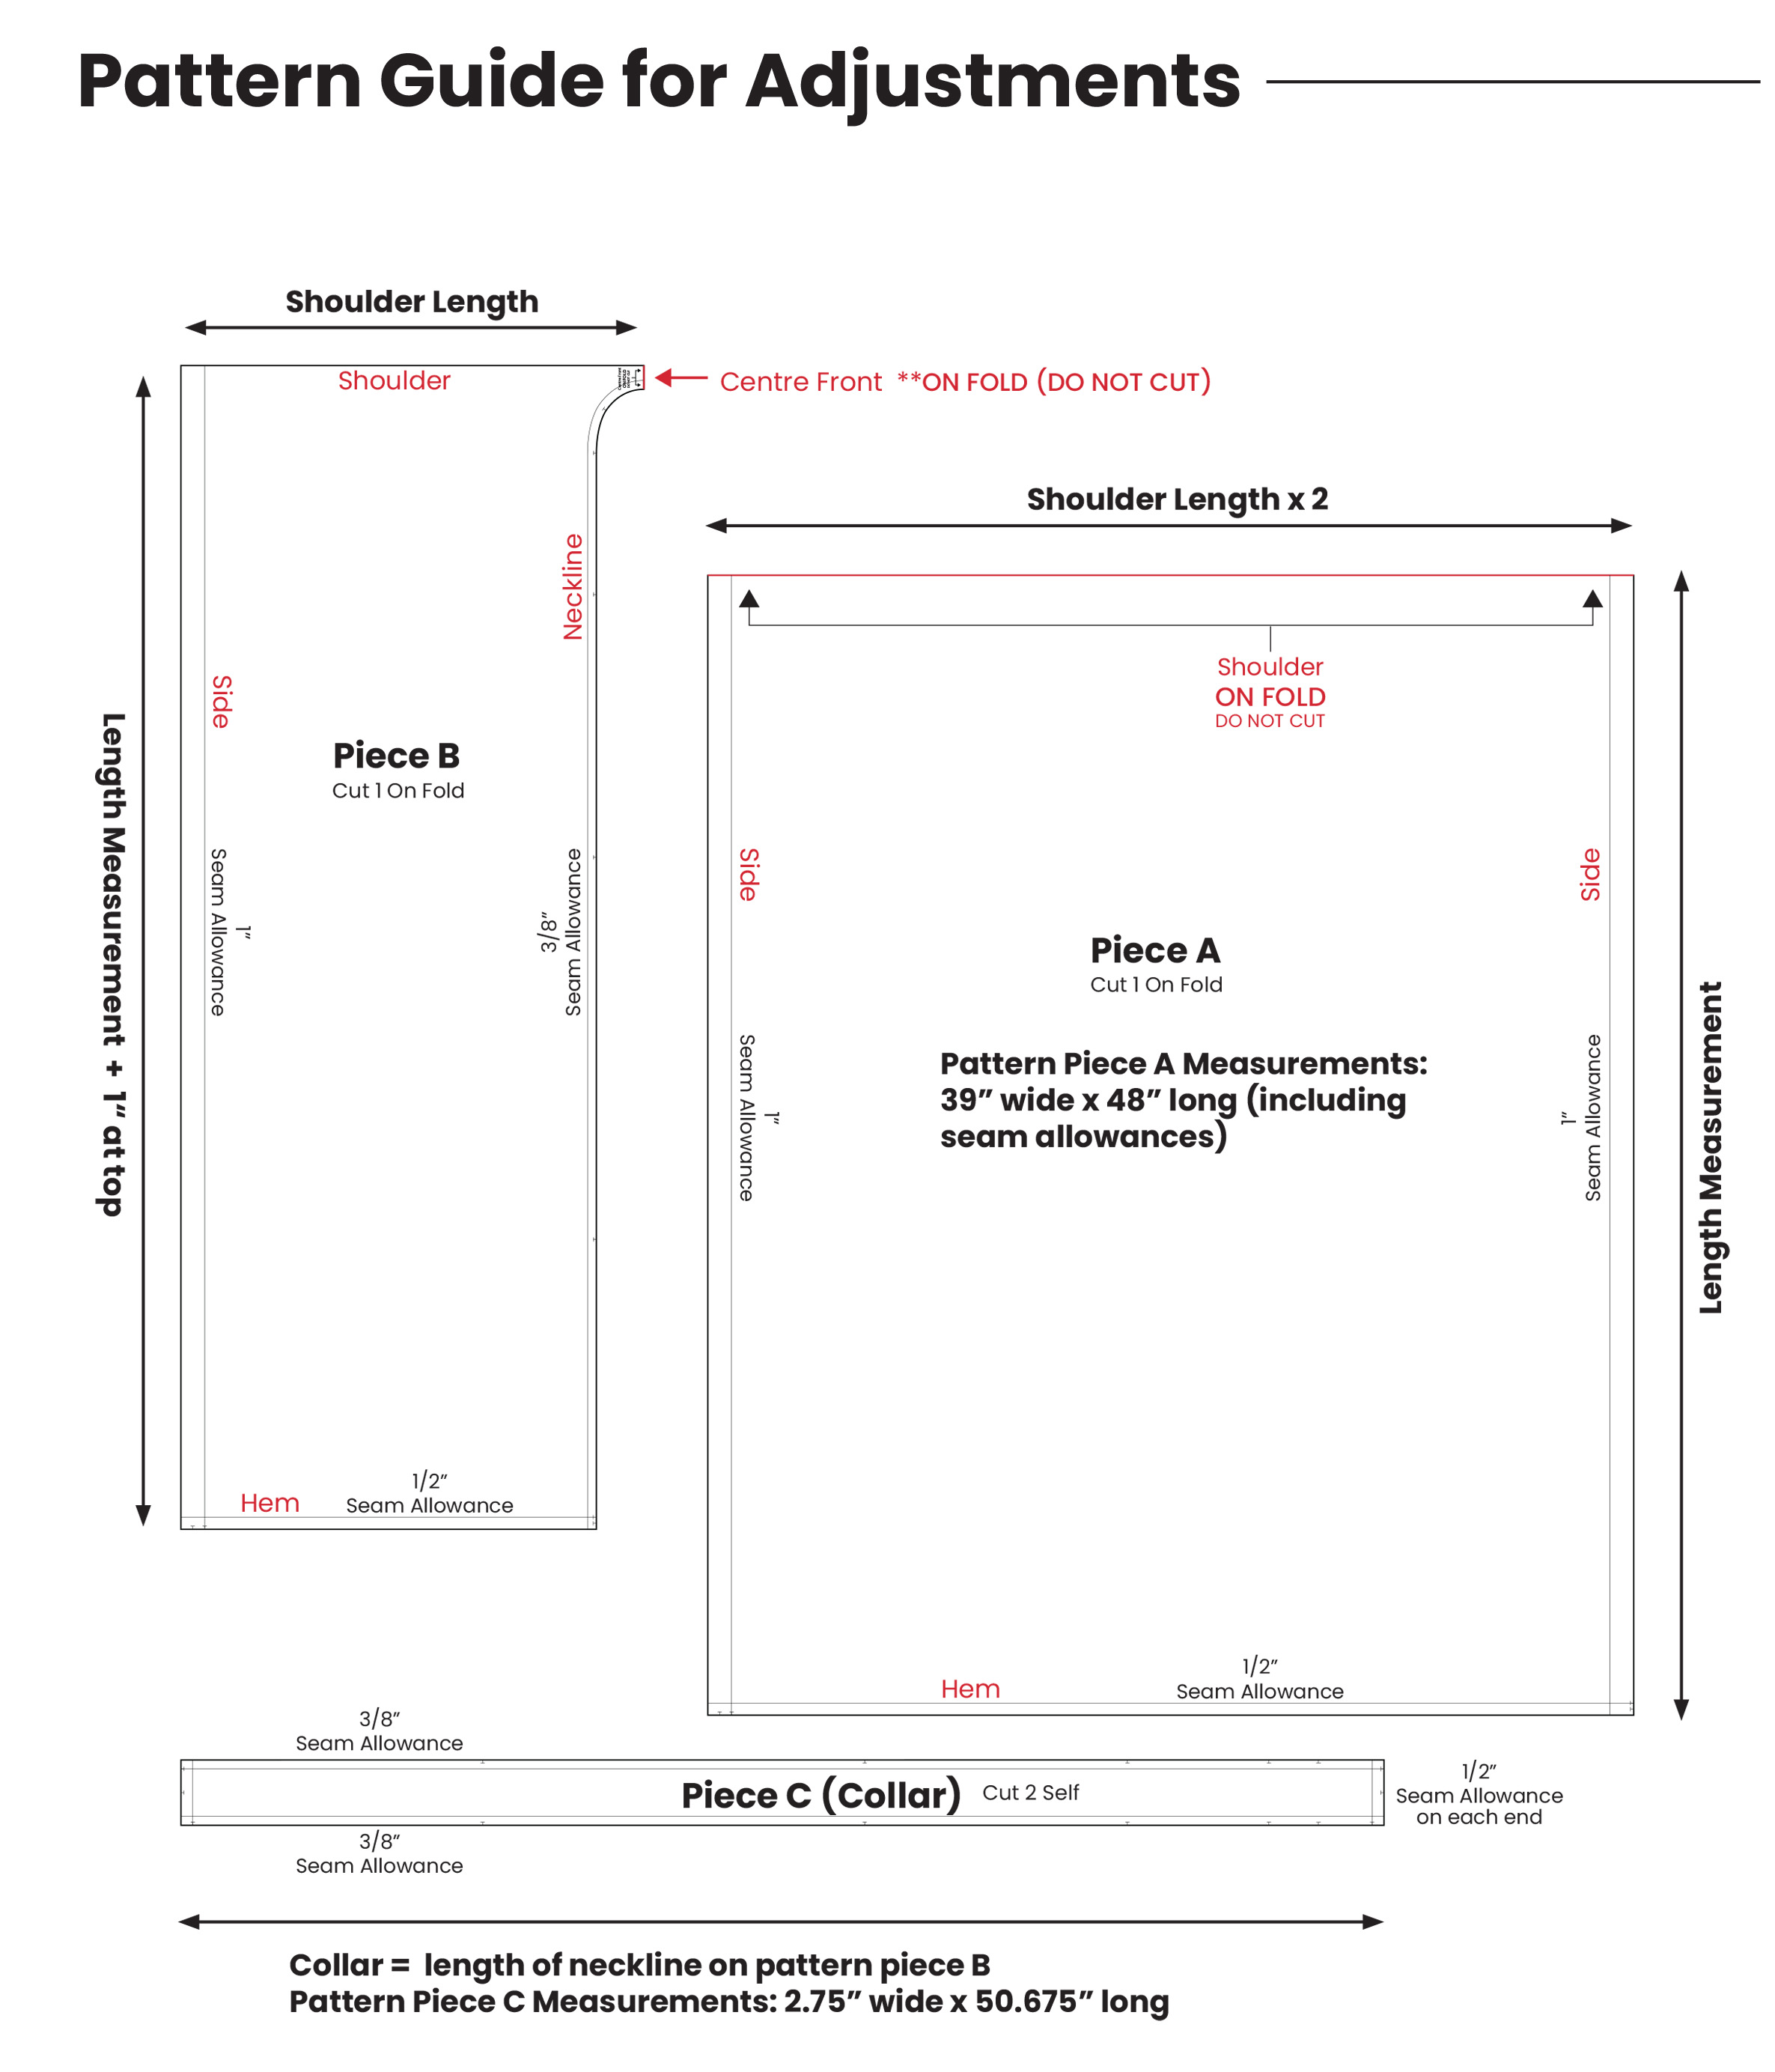
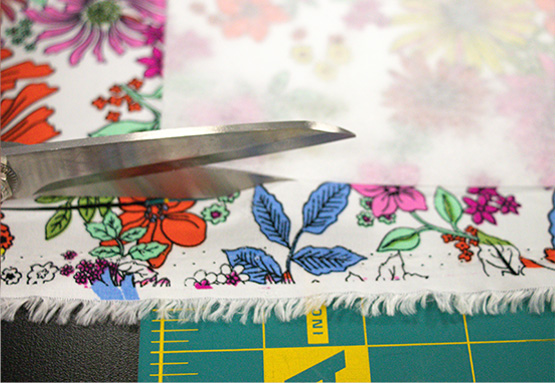
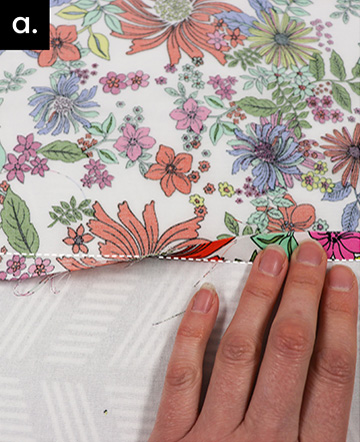
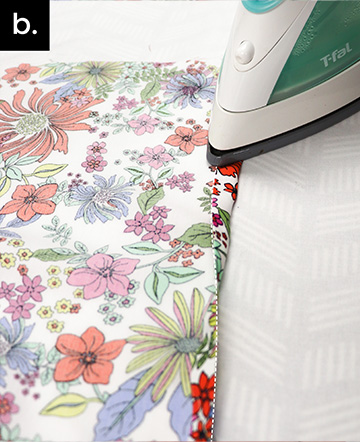
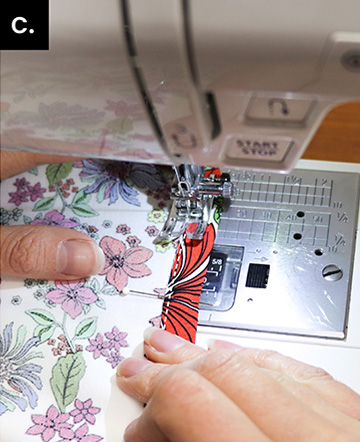
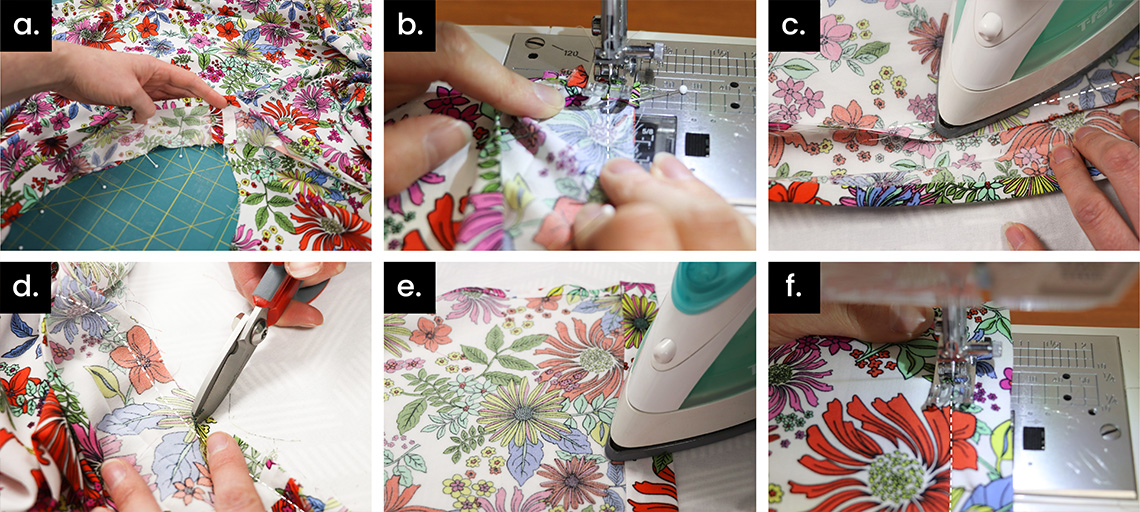
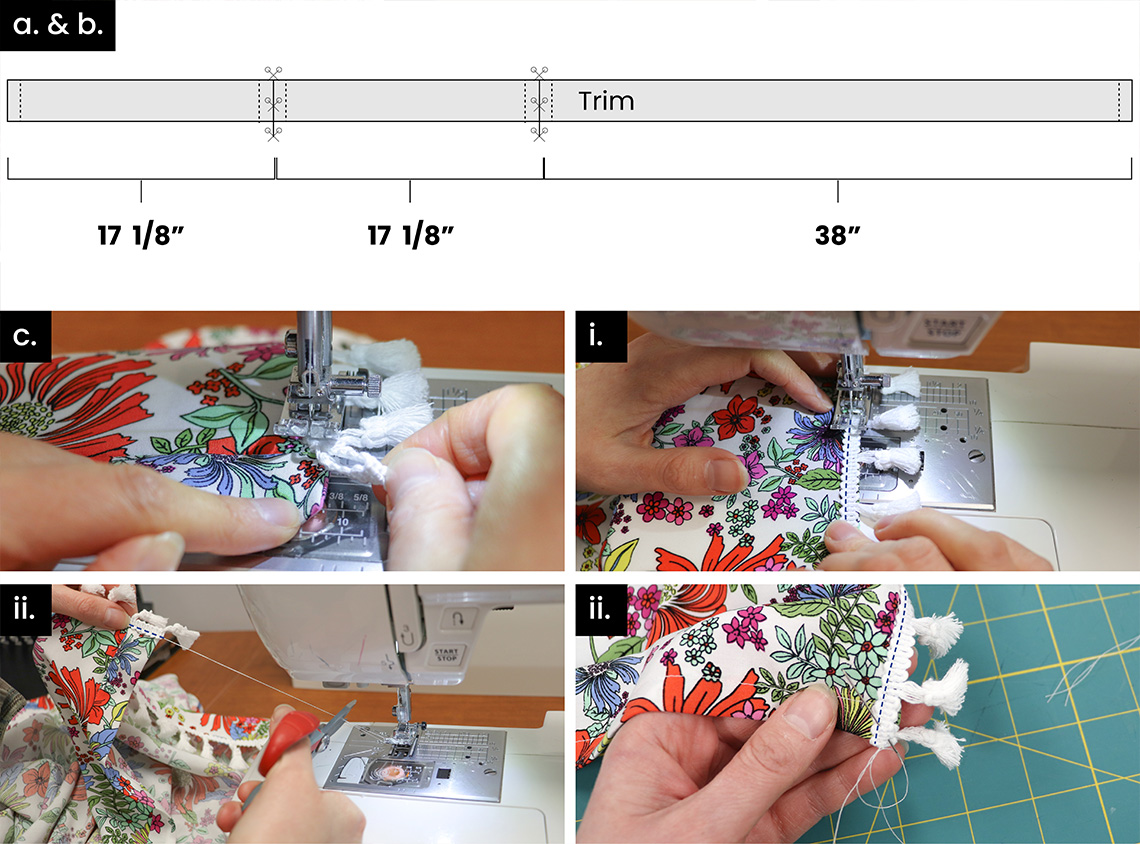
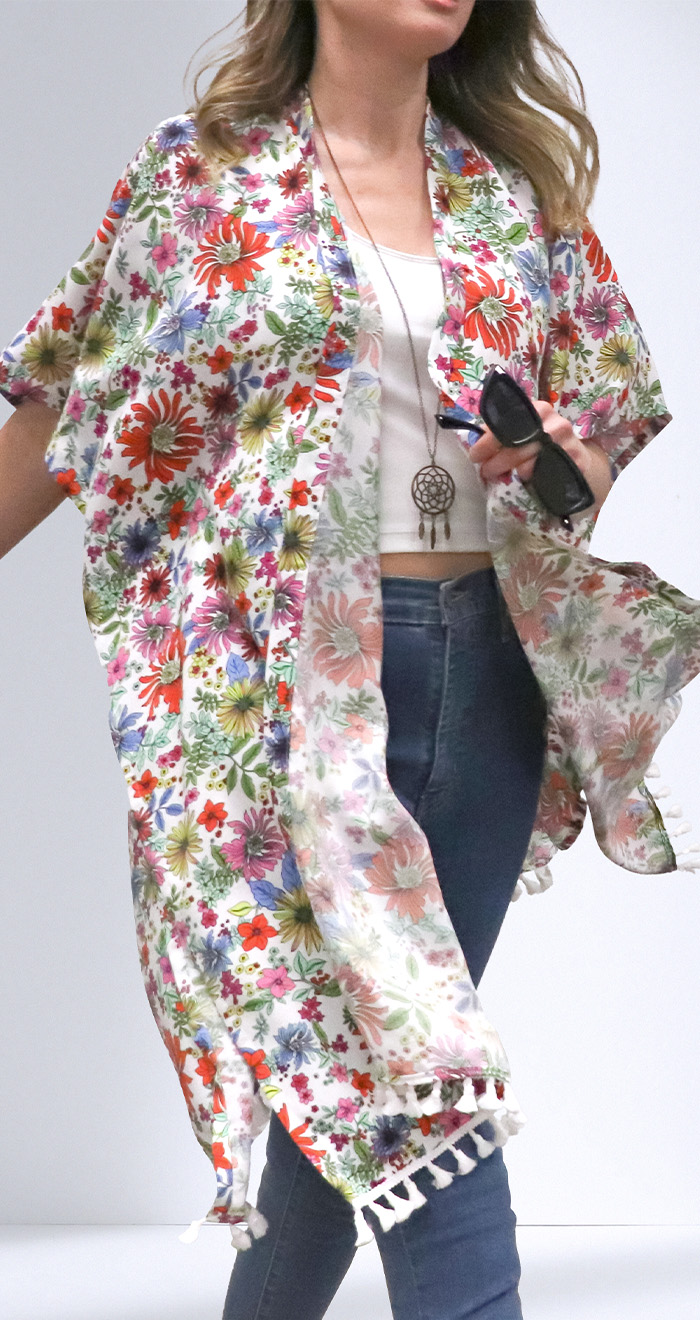
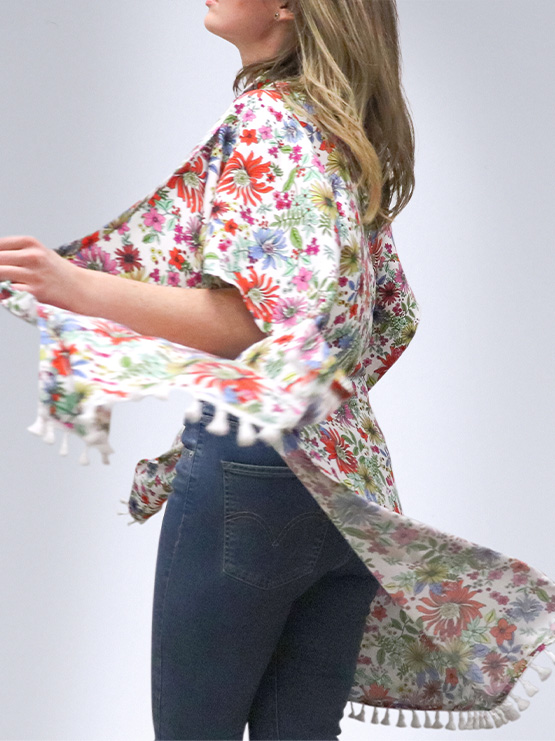
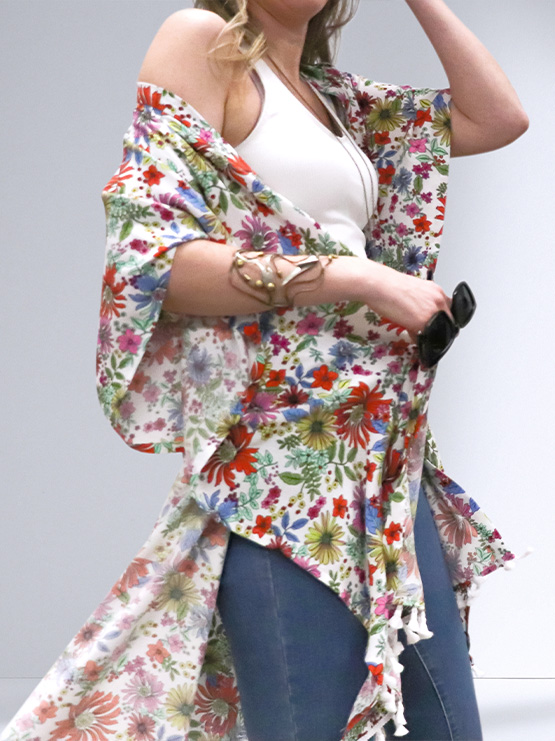
Summer Cover Up


e

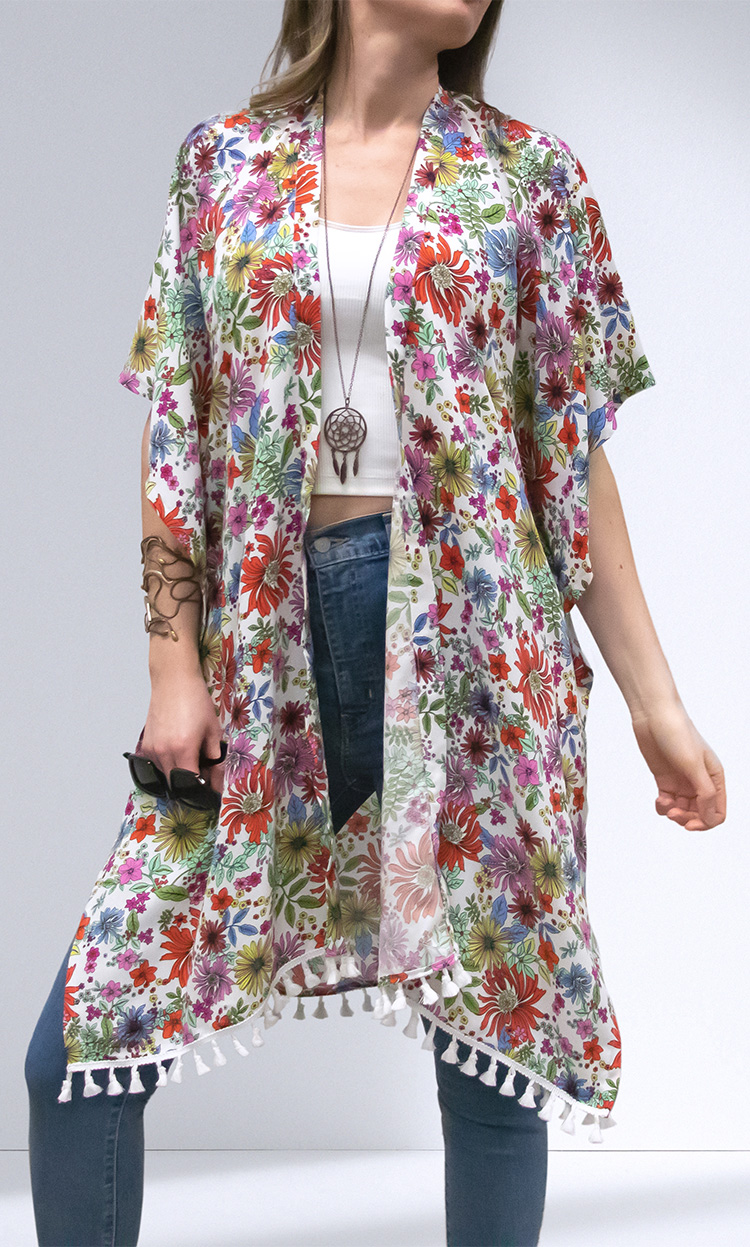
Start creating your summer fashion wears with May's DIY of the Month: Summer Cover-Up.

Create yours for beach days, vacation wear or as a colourful accessory for your work or weekend outfits!

*Please share your creations on Facebook & Instagram. Tag Fabricland at @fabriclandcanada or use the hashtag #fabriclandlove


e
f


What you need:

  • 1 spool of polyester thread. (In this example: Gutermann Thread – colour 21, 100% polyester.)
  • Fine sharp pins.
  • Sewing machine needle (For rayon - 70/10 universal or fine sharp sewing machine needle is recommended. Use the appropriate needle for the fabric you’re using).
  • Fine sharp hand sewing needle.
  • Scissors.
  • Rotary cutter (optional)
  • Lightweight fabric with a fluid drape. (Refer to the size chart for the amount of fabric needed.)
  • Accent trim. (Refer to the size chart for the amount of fabric needed.)
  • Sewing machine
  • Iron
  • Pressing Cloth

Tips before you start

  • It’s a good idea to pre-wash and press your fabric before you start, especially with rayon because it will shrink. However, some fabrics are not machine-washable, so follow the care instructions for your chosen fabric.
  • Press using a pressing cloth to prevent damaging your fabric. Test your iron settings on a scrap piece of fabric before you start your project.
  • On lightweight flowy fabrics, fabric weights work well instead of pins to hold your pattern down while you cut. A rotary cutter is also recommended for these types of fabrics.
  • Decide approximately what length you want your cover up to be before you cut your fabric and shorten or lengthen the pattern accordingly.
  • Try sewing on a scrap piece of fabric before sewing your garment pieces. Adjust your tension, stitch length, and needle type accordingly.

Fabric Recommendations

Lightweight woven fabrics with a fluid drape, such as:

  • Rayon (used in this example)
  • Georgette
  • Voile
Measurements

If you want to adjust the pattern to your body measurements follow this measurement guide to determine your pattern adjustments.

Measurement Chart
Finished Garment Measurements (inches) (centimeters)
Shoulder Length
Full Waist
Total Length

18.5” (47cm)
Up to 58” (147.3cm)
47.5” (120.7cm)
Fabric Requirements (metres) (yards)
45” (114.3cm) wide fabric
60” (152.4cm) wide fabric

2.7 m (3y)
2.7 m (3y)
Ribbon or acccent tape (meters)(inches) 2m (2.2y)


NOTE: This pattern is made to fit many different sizes. Simply adjusting where you sew your armholes in step 7b will determine how tight or loose fitting your cover up is.

However, feel free to adjust the pattern as needed for your own body measurements using the measurement guides and patten layout below.


x
x
Instructions

x
x

Step 1 : Print pattern pieces on 8.5” x 11” paper and tape them together.

Align the pattern by matching the corners of each diamond. The pages are numbered in order from left to right. If you have pattern paper, you can draw piece A instead of printing it out. (See measurements on pattern PDF on pg. 1)

x
x

Step 2 : Cut out your fabric.

a. Fold fabric in half lengthwise aligning the edges with your table or cutting mat to make sure the fabric will be cut on grain in both directions.

b. Follow the “Pattern layout for cutting” visual guide in the PDF. Place the fold line of pattern piece A on the fold of your fabric. Align the grain line of the pattern piece parallel to the selvedge edge. Place your collar beside piece A and cut your fabric.

c. Open your fabric and fold it in half crosswise.

d. Align the hem and side edges of the pattern piece B with the outer open edges of your fabric. The centre front will sit on the fold line of your fabric. Cut out the neckline.

a
b
c

Step 3 : Finish the side seam edges with a 1/2” double turned hem.

a. Baste along the hem with a 1/2” seam allowance, leaving a tail of thread at the beginning and end. Do not backstitch.

b. Press the seam to the wrong side of the fabric 1/2” and press. Then turn it up one more time 1/4” and press again, pinning as you go.

c. Sew the hem in place along the top of the fold.

a
b
c

Step 4 : Hem the cover up with a 1/4” double turned hem.

a. Baste along the hem with a 1/4” seam allowance, leaving a tail of thread at the beginning and end. Do not backstitch.

b. Press the seam to the wrong side of the fabric 1/4” and press. Then turn it up one more time 1/4” and press again, pinning as you go.

c. Sew the hem in place along the top of the fold.

x

Step 5 : Prepare the collar

a. Sew the collar pieces together at the centre back with a 1/2” seam allowance. Backstitch at the beginning and end.
b. Press the seam open.
c. Press the collar in half lengthwise, making one side about 1/8” wider than the other.
d. Press the wider side of the collar towards the wrong side 3/8”.
e. Fold the right sides together at the ends of the collar, and sew along the short side with a 1/2” seam allowance. Backstitch at the beginning and end. Then fold it right side out.

x

Step 6 : Sew the collar to the neckline.

a. Pin the unfolded, raw edge of the collar to the neckline, starting at the centre back aligning the notches as you pin.
b. Sew the collar to the neckline with the collar facing up using a 3/8” seam allowance. Fold the other side of the collar out of the way as you sew. Make sure the under layer is as smooth as possible to prevent puckers at the top of the neckline. Backstitch at the beginning and end.
c. Press the seam towards the collar.
d. Clip the curve of the neckline up to 1/16” away from the seam.
e. Fold the collar over the seam and press in place, pinning as you go. The folded edge of the collar should just cover the stitch line.
f. Stitch in the ditch of the collar seam line on the right side. Backstitch at the beginning and end.

e

Step 7 : Create the armholes.

a. Fold the cover up in half lengthwise and measure 13” down from the folded shoulder line and mark with a water soluble marker or pin.

b. Measure 6” (or your desired measurement) in from the sides and mark where these measurements intersect.

c. Pin the side seams in place starting at the intersection and down 5”.

d. Stitch it in place, backstitching at the beginning and end.

e

Step 8 (OPTIONAL) : Prepare the trim

a. Measure out and mark the sections of trim.
**If you added to the width of your pattern you will need to measure the hem and add 1” to each section.

b. Stitch across the ends of each marked section of trim to stop them from fraying. Then cut each section just past the stitch line.

c. Align the trim with the hem, folding 1/2” of each end under itself. Pin it in place and stitch along the top of the trim, backstitching at the beginning and end.

**If the ends are too bulky to backstitch over:

i. Start sewing a little past the folded end. Backstitch at the beginning but when you get to the other end, do not backstitch.

ii. Raise your needle and pull the fabric out, leaving long thread tails. Tie the threads together by hand and feed the thread through the trim with a hand sewing needle.

iii. Flip the fabric the other way and start sewing the open end of the trim, backstitching at the beginning but not at the end. Follow the previous step when you get to the end.

Step 9 : Give it a final press and try it on! Try different woven fabrics and trims for different effects.

e
f e

Note:All products might not be available at all store locations. To find a suitable product alternative for your project, please ask a store team member for assistance.

More DIY Crafts

DIY of the month DIY of the month DIY of the month
Homepage

More DIY Crafts

Sales Slyer

Learn 'HowTo'

Sales Slyer

Sales Flyer

maple

PROUDLY CANADIAN

2024 © Fabricland - All Rights Reserved