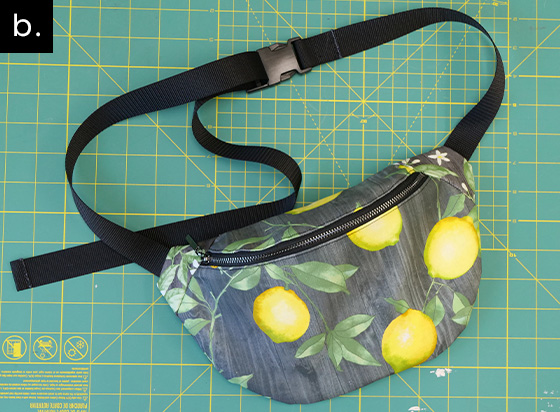
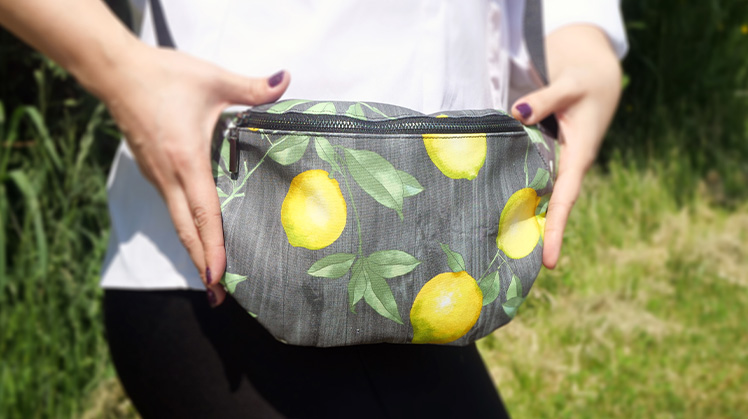
Fanny Pack

for Outdoor & Camping


e
f
e
f

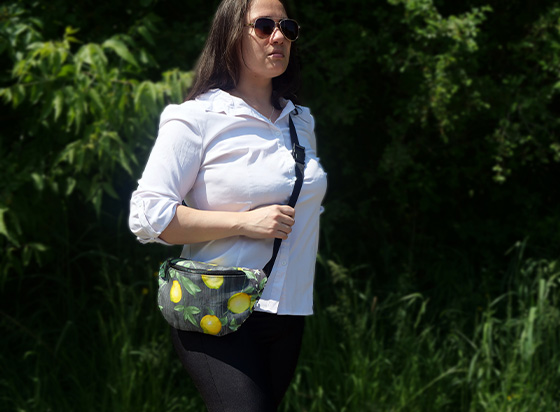
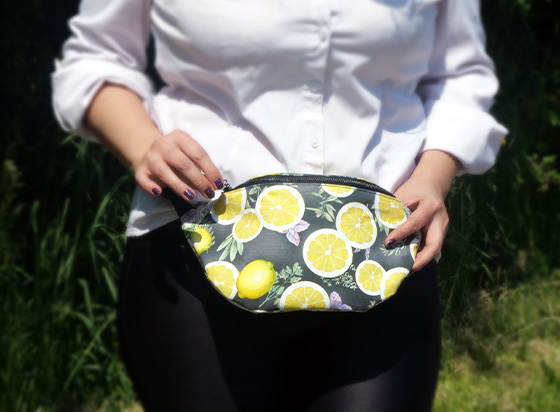
Whether you call it a fanny pack, a bum bag or a hip pack, this popular 90s wardrobe staple is making quite the comeback as a trendy, must-have accessory.

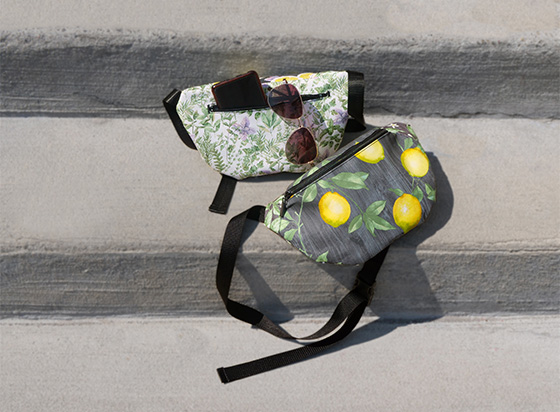
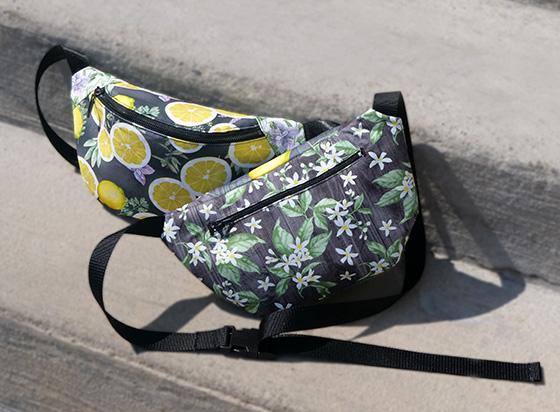
Easily keep your essentials organized as you tackle your work day, hike with friends or attend summer festivals. When life gives you lemons, make a fanny pack!

*Please share your creations on Facebook & Instagram. Tag Fabricland at @fabricland.canada or use the hashtag #fabriclandlove


What you need:

  • 20” (50cm) Medium Weight Fabric (Fabric A)
  • 20” (50cm) Medium Weight Fabric (Fabric B)
  • Parachute Clip 1” (2.5cm)
  • 50” (127cm) of Nylon Belting 1” (2.5cm)
    Note: For additional length, add accordingly to your belting measurment.
  • Closed End Metal Zipper 9” (23cm)
  • Dress & Skirt Zipper 7” (18cm)
  • 20” (50cm) Double-Sided Fusible Web
  • Sewing Machine & General Purpose Thread
  • Zipper Foot
  • Dressmaker Chalk
  • Fabric Scissors & Pins
  • Iron & Ironing Board
  • Cutting Mat
  • Optional: Double Fold Bias Tape

Tips before you start

  • It is recommended to pre-wash and press your fabric before you start to avoid shrinkage. Be sure to check the care instructions for your chosen fabric. For testing purposes, try pressing with the iron, and sewing a scrap piece of fabric, before starting your project.
  • When using cotton, press using a pressing cloth to prevent damage.
  • Adjust your tension, stitch length, and needle type accordingly.
  • It is a good idea to fill multiple bobbins before starting the project.
  • As indicated on pattern, mark with chalk on the fabric the following:
    Back: Zipper Guide, Connecting notch.
    Front side: Markings to indicate where the belting enters.
  • Ensure pattern is to scale by confirming that printer settings are set to actual size and not reduced.
  • POF (Pin On Fold) The pattern indicates that the edge piece will be placed on a folded fabric and the folded side will not be cut.

Fabric Recommendations

Medium weight cotton fabrics the same weight and fibre content are reccommended for this project. If you would like to use another fabric type, test the fusible web on a scrap piece of your chosen fabric before committing.

Note: Some synthetic fabrics are not tolerant to high heat.

Instructions

x
x

Step 1: Fusing Fabric & Pattern Cutting.

a. Prep your fabric for cutting. Choose two fabrics to be Fabric A and Fabric B
Adhere the wrong sides of fabrics A and B together. This can be done by placing double-sided fusible web between the layers and fusing it together with an iron.


b. Cut out pattern pieces from your newly created double-sided fabric (Free PDF pattern included with these instructions).
Note: All pattern pieces are symmetrical, meaning you can mix and match which side of the fabric you want showing on the final product.

a
b
c

Step 2: Attaching the 7” (18cm) Zipper to the Back Pattern

On ONE of the back pieces, cut out the zipper guideline.
Pin the 7” (18cm) zipper in place and with a zipper foot, sew at 1/4” (.25”) (0.6cm) along the opening.
Repeat on the other side.

x
x

Step 3: Topstitching the Back Zipper

a. Topstitch at 1/8” (0.12”) (0.3cm) around the zipper. Iron if needed.


b. Zigzag stitch at both ends of the zipper opening.
Note: Be careful to not hit the metal ends of the zipper.

x
x

Step 4: Attaching the Back Pieces

Pin both back pieces together and sew at 1/4” (6mm).


Now we have a handy back pocket for our Fanny Pack.

x
x

Step 5: Attaching the 9” (23cm) Zipper to the Front Pieces

a. Sew the 9” (23cm) zipper at 1/4” (0.25”) (0.6cm) along the top of the Front Bottom piece. Iron or finger press, then top stitch at 1/8” (0.12”) (0.3cm).


b. Sew the Front Top piece to the zipper at 1/4” (6mm). Top stitch at 1/8” (3mm).

x
x

Step 6: Attaching Side Pieces

Sew the Front Side pieces to the Front piece at 1/2" (1.3cm).


Iron as needed.

a
b
c

Step 7: Fold & Topstitch Side Piece

You’ll notice approximately 1.5” (3.8cm) of excess. This should be folded, pinned and topstitched at 1/8” (3mm).

Keep the zipper open after the top stitch until project is complete.

a
b
c

Step 8: Creating the Waistband

a. Cut a 14.5” (37cm) strip of Nylon Belting. (Or the size that is suitable for your project.)

Burn the ends of the Nylon Belting strip.

Fold the end of the strip .5” (1.3cm) and zigzag stitch along the raw edge.

Weave it through the male buckle side.


b. Cut a 33.5” (85cm) strip of Nylon Belting. (Or the size that is suitable for your project.)

Burn the ends of the Nylon Belting strip.

Weave it through the female buckle side and fold 1.5” (3.8cm).

Straight stitch .5” (1.3cm) away from the parachute clip and stitch again 1/8” (3mm) away from the raw edge.

x
x

Step 9: Attaching Front & Back Pieces

a. Place and pin the Nylon waistband belt ends between the chalk markings on the curved side of the Front Side piece from the inside. Only 1/4” (0.25”) (0.6cm) should be sticking out beyond the fabric to become visible. Stitch over the fabric between the markings to reinforce the Nylon Belting.


Pin the Front and Back pieces, right sides together and sew a .5” (1.3cm) seam allowance.

Optional: At this stage you can use bias tape to hide the raw edges inside the bag.


b. Turn inside out through the pocket opening.

x

Note: All products might not be available at all store locations. To find a suitable product alternative for your project, please ask a store team member for assistance.

More DIY Crafts

DIY of the month DIY of the month DIY of the month
Homepage

More DIY Crafts

Sales Slyer

Learn 'HowTo'

Sales Slyer

Sales Flyer

maple

PROUDLY CANADIAN

2024 © Fabricland - All Rights Reserved