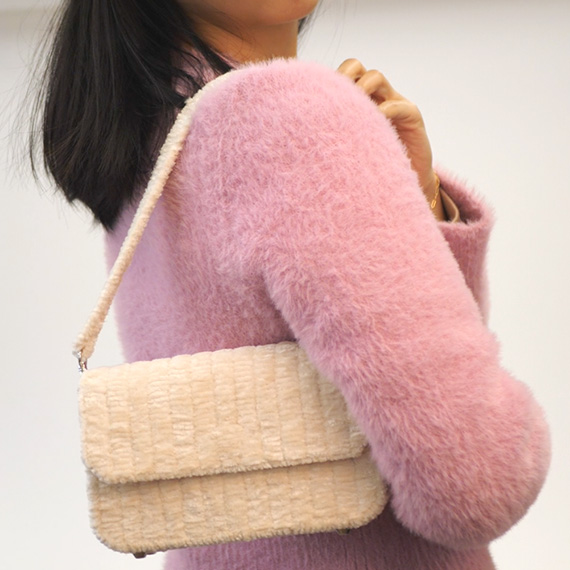
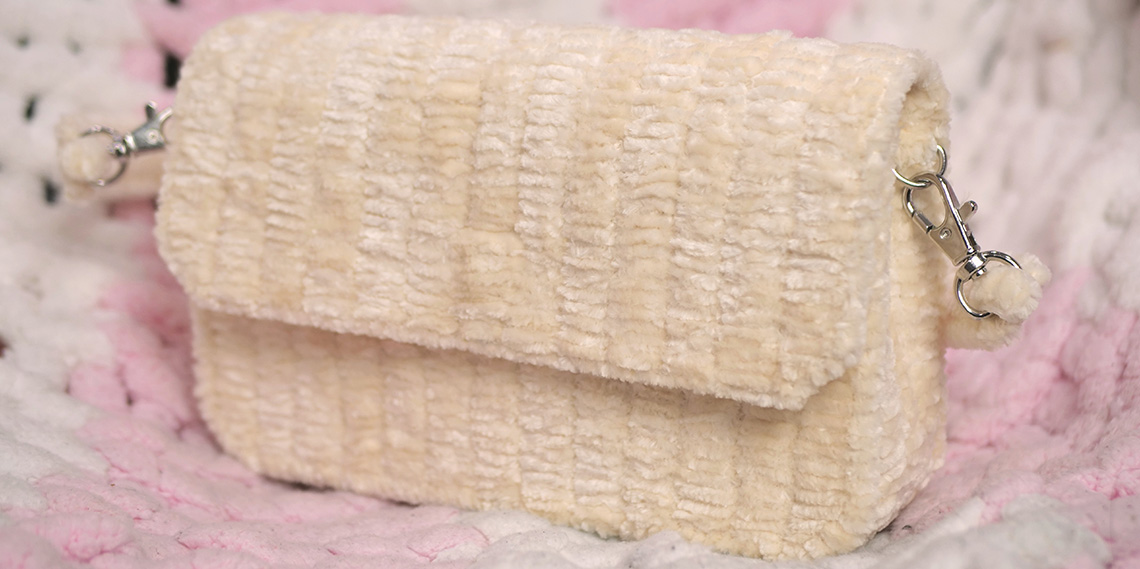
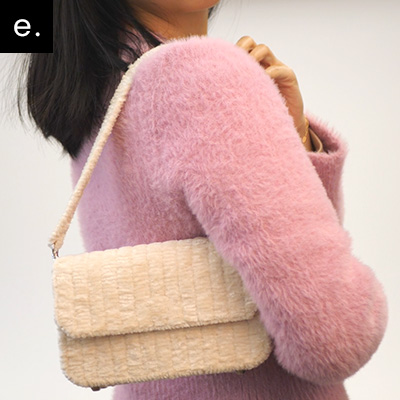
Woven Yarn Bag
Plastic Canvas has a popular crafting history of embroidered coasters, Easter baskets, tissue box covers or Christmas kiss ornaments. Now, think outside the box, and say hello to your newest craft obsession!
Our Woven Yarn Bag DIY is that unique project you’ve been seeking. Download your free step-by-step instructions and create something fabulously stylish.
Difficulty Level: Intermediate

Yarn Recommendations
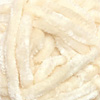
For this project we used one ball of our Tailor Yarns Luxious yarn in the colour Pearl.
- You can use any bulky weight yarn with a weight of 5.
- For the best results, use a yarn with a fluffy velvet texture.

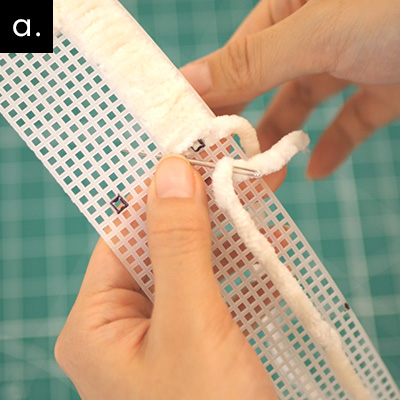
Step 1: Cut out the pieces of the plastic canvas
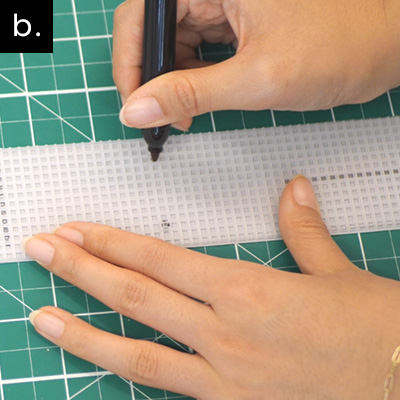
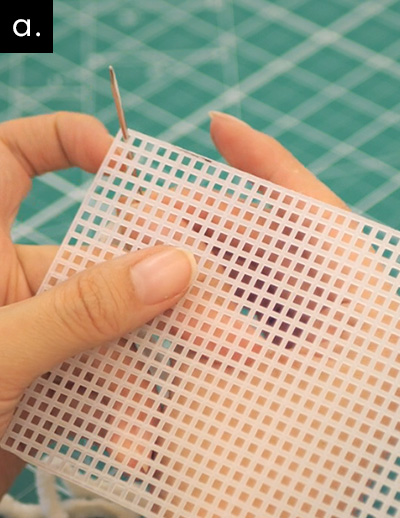
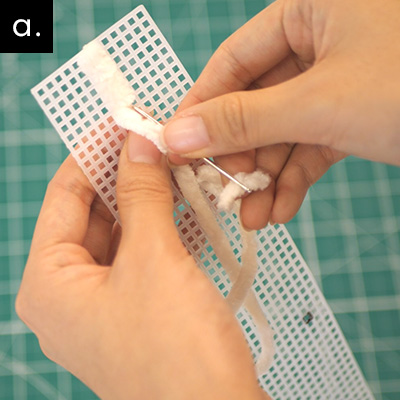
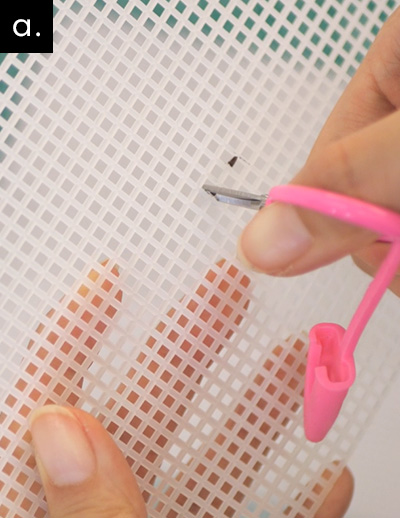
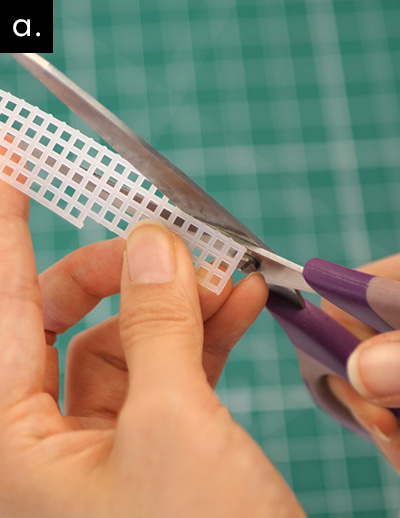
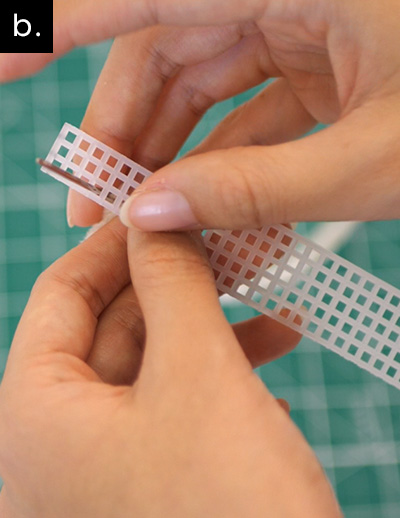
a. Cut a strip of plastic canvas that is 5 squares wide, and 22.5” long (the length of the long edge of the canvas). This will be used for the strap in step 8.
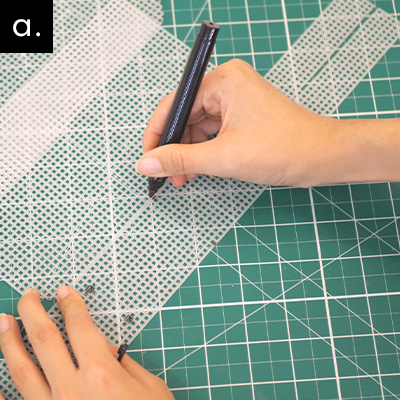
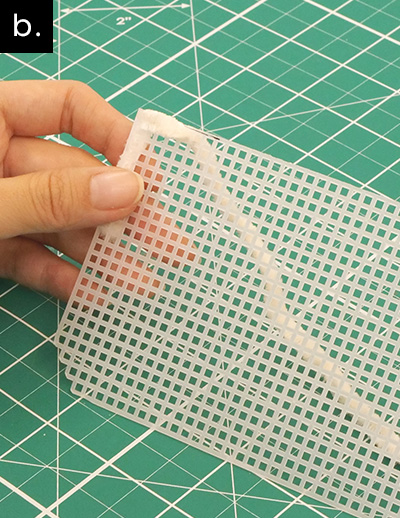
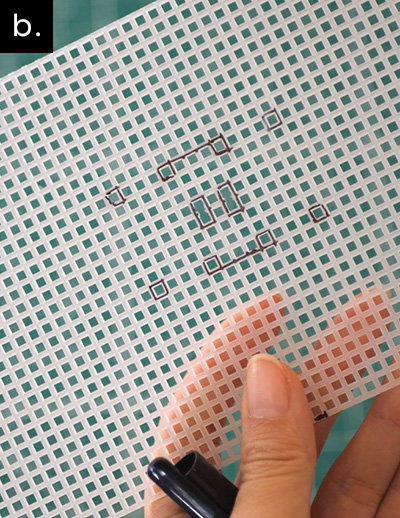
b. Cut out all the templates from the PDF pattern provided. Tape together panel D-1 and D-2, do not overlap the edges.
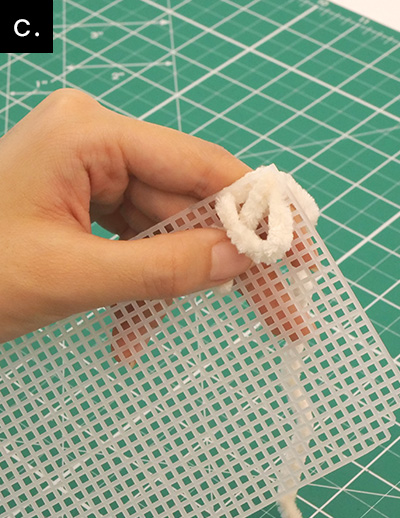
c. Use the pattern as a guide to cut out the panels. Count out the correct amount of squares before cutting. Trim left over fringe.
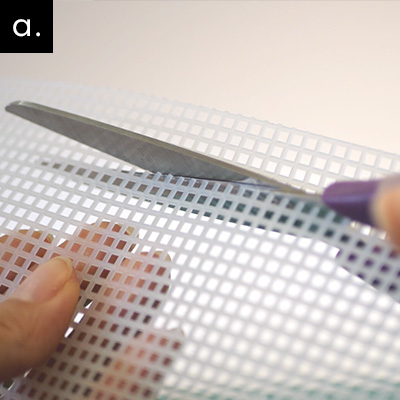
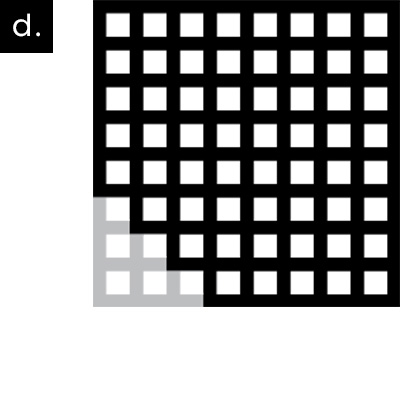
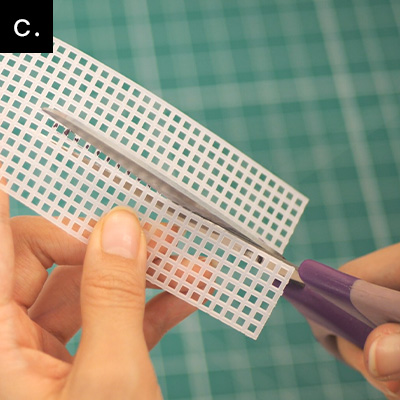
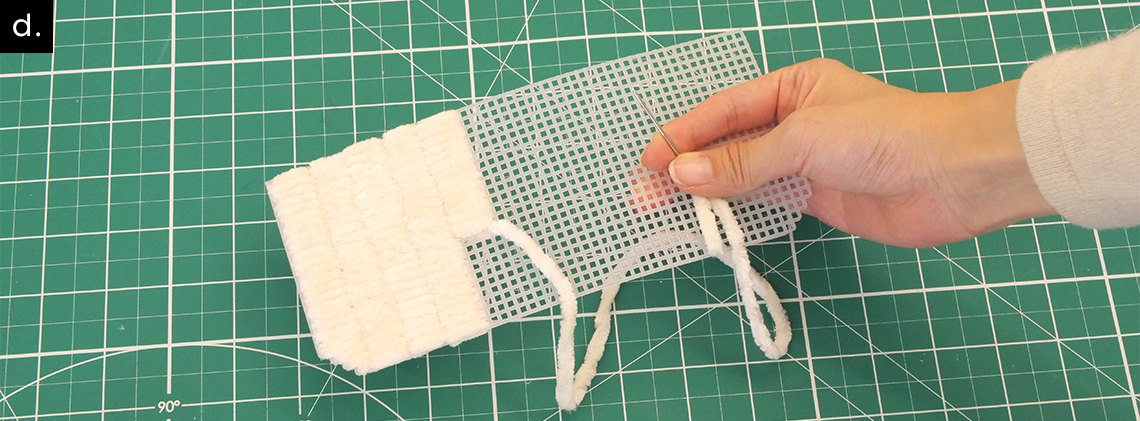
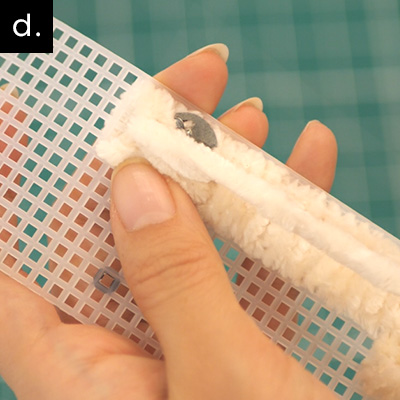
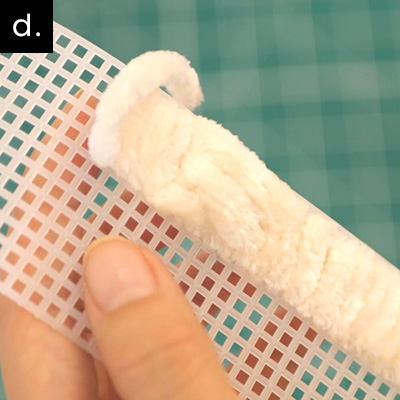
d. Referencing the paper pattern, cut the corners on panel A, B, and C using the image above.
Step 2: Prep the Panels
a. To assist in the stitching process in step 9, mark the midpoints on the bottom edge of panel A, B, and C. Also mark the midpoint of the long edge of panel D, on both sides.
b. On panel D, mark the lenth of the side seam and squares where the purse feet will go.
c. Cut out the side seam on panel D (23 squares down).
Step 3: Cowboy Boot Appliqué (Cowboy Boot Stocking)
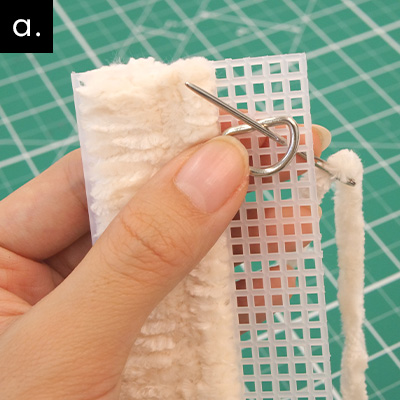
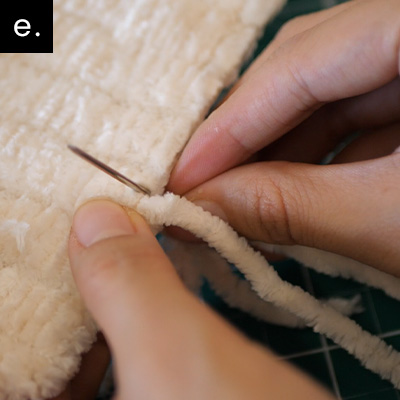
a. Thread the needle with an arm’s length of yarn. With the front of the panel facing you, insert the threaded needle from the back into the top left square. Pull through leaving a 1” tail.
b. Moving from left to right, insert the needle into the fifth square of the row. Pull through, continuing to hold the tail in place.
c. Turning the panel around, insert the needle into the square second from the top. Make sure to go over the tail with this stitch. This creates your “regular” stitch for this project..
d. Keep working your stitches in rows until the last 2-3” of yarn. Always stitch in the same direction for an even backside of canvas. Transfer your needle to a new piece of yarn. Insert the needle into the same square with the tail. The needle should come out the same direction as the tail.
e. Continue regular stitches while incorporating both yarn ends.
f. To transfer over columns, make sure your thread is in the square on the side you want to transfer to. Stitch over four squares and pull through. The last square of your first column creates the fifth square of the stitch.
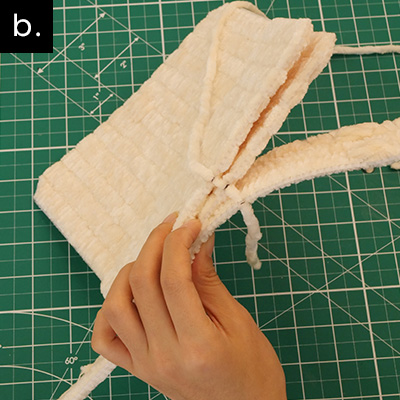
Step 4: Stitching up Panel D
a. Stitch up the gap that was cut in Step 2 c. Incorporate the tail into the stitches, making sure that the stitches are loose, and the panel is able to lay flat. This will allow the finished bag to “flex” more.
b. Once you reach the end, take the end of the thread and insert it through 1” of the stitches. Cut off any excess. Repeat steps a. and b. on the other side.
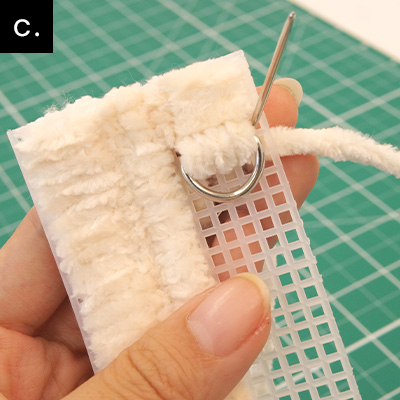
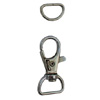
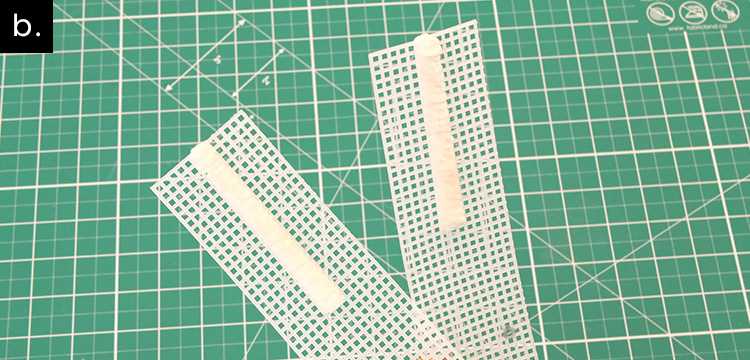
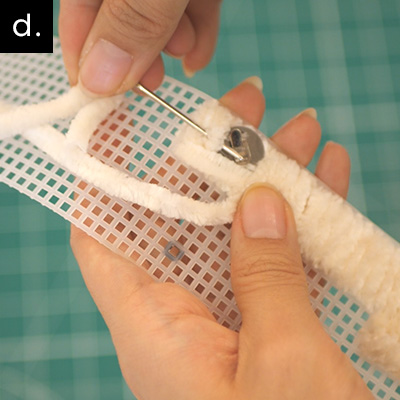
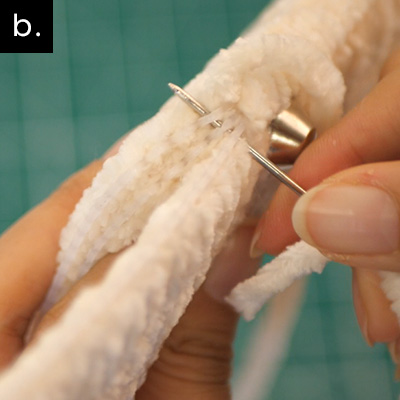
Step 5: Adding the D-Rings to Panel D
a. The D-ring is added to the top right-hand side of panel D. It is stitched between the 4th and 5th rows from the top. From the back, insert the needle into the square fifth from the top, and second from the right. Pull through, holding a 1” tail.
b. From the front, stitch over the straight edge of the D-Ring, into the square fourth from the top, and second from the right. Continue until the end of the D-ring. For extra security, go over the stitches again in the other direction (Towards the right-hand side).
c. Using the same string, insert the needle into the back, top-right corner. Pull through. Stitch into the square fifth from the right. Be sure to fill in the whole column on the left-hand side.
Continue regular stitches down until the marking for the purse foot.
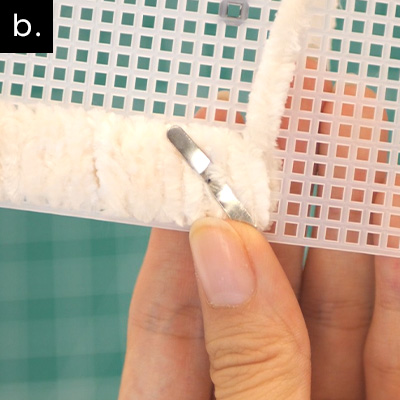
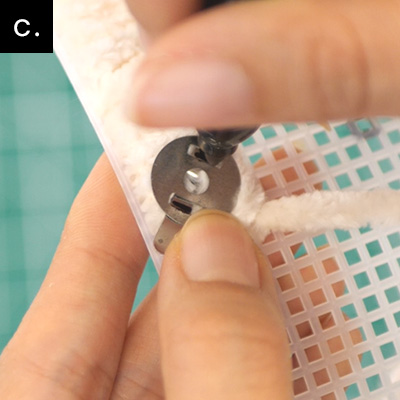

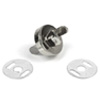
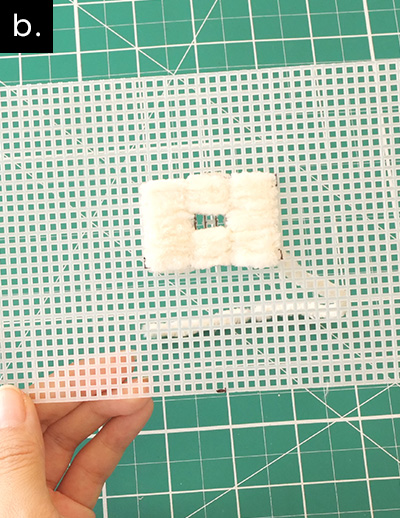
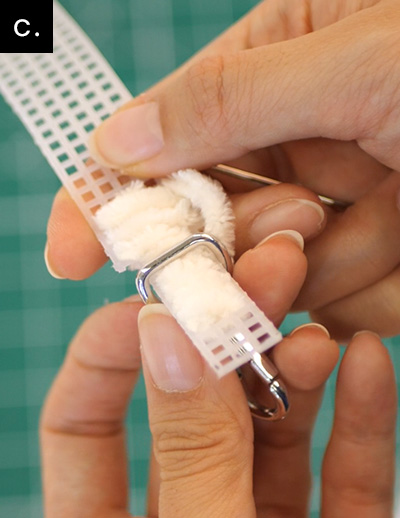
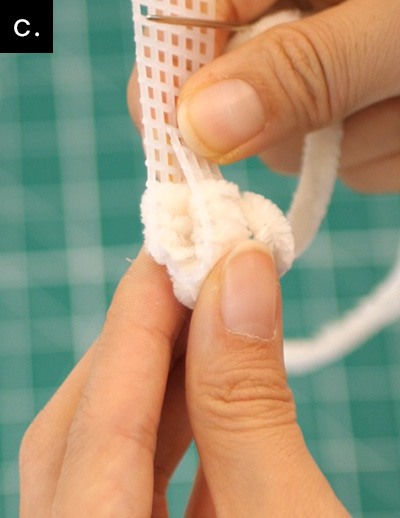
Step 6: Adding Purse Feet to Panel D
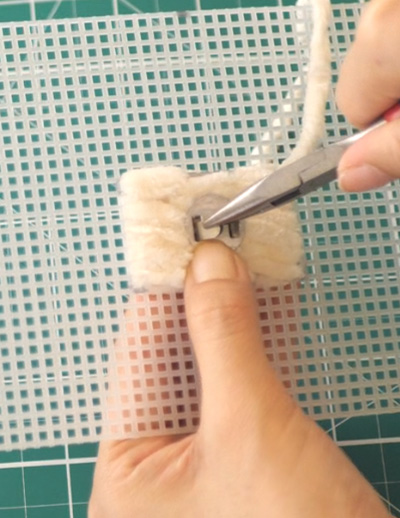
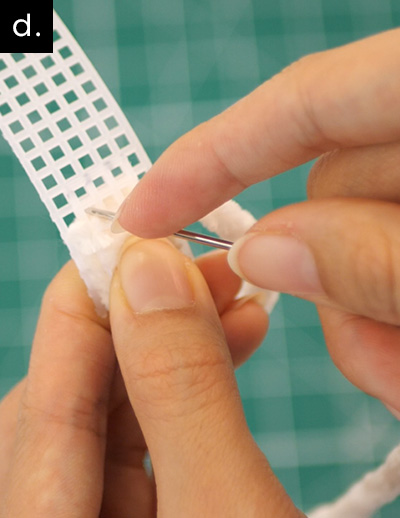
a. Once you reach the purse foot marking, make a note of which square is marked. Add a place holder in the square, such as a sewing needle or spare bit of thead. Continue to stitch over the marking by three rows.
b. Insert the end of the foot into the marked hole, and fully open the legs of the butterfly clip.
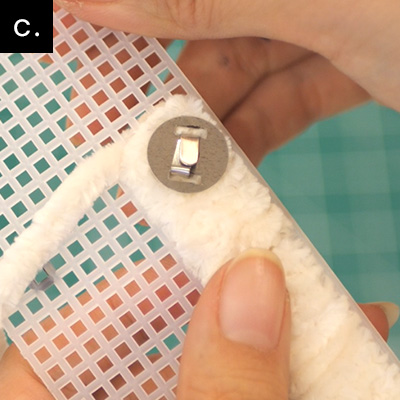
c. Using the metal backing, mark where the holes will align. Taking your pliers, bend the legs in a right angle at the markings. Attach the metal backing, and firmly press down on the legs.
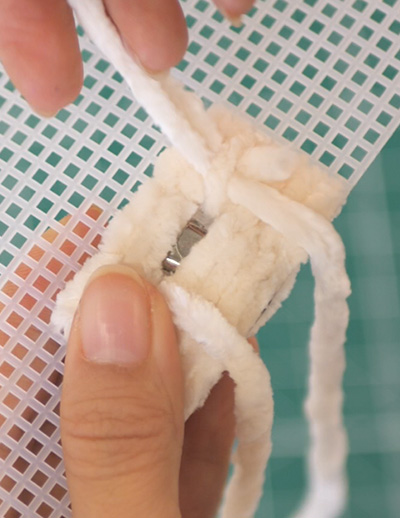
d. Weave over the back side of the foot to cover the metal backing. Continue with regular stitches until the next foot. Repeat steps a. through d. until the end. Fill in the middle of the panel.

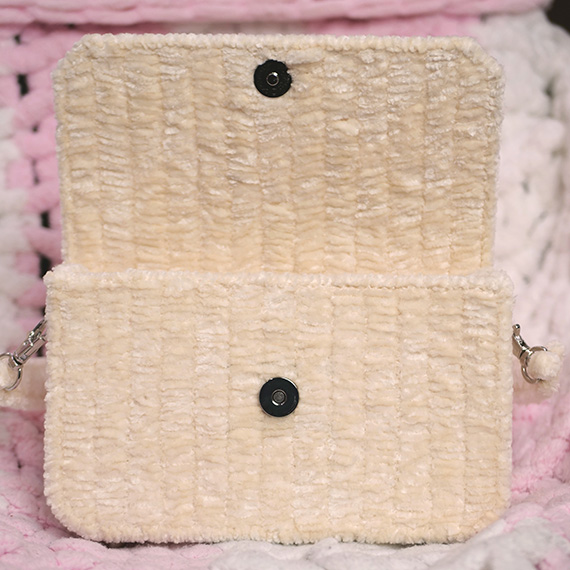
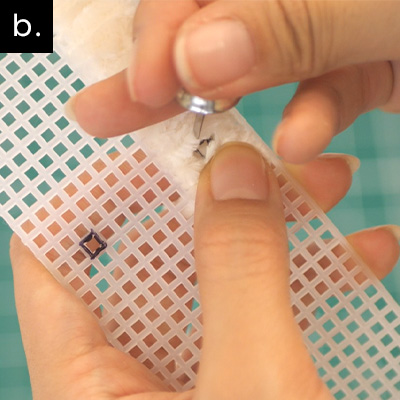
Step 7: Adding Magnetic Purse Clasps
a. Mark and cut out the magnet in panel A and B. When cutting the slots for the magnets, cut the dividing line of plastic between the two squares.
b. In order to add the magnetic purse clasp, you need to add stitches around where the magnet will be. Once the magnet is in, you won’t be able to stitch under or around it. Use image B as a reference point for how much of the area needs to be covered before inserting the magnet. Do not stitch through the centre 6 squares.
c. On Panel B, insert the female magnet so the face is on the same side as the right side. On Panel A, insert the male magnet so the face is on the same side as the back side.
d. Add the metal backing to the magnet, and use pliers to push down on the feet.
e. Weave over the metal backing, going with the grain of the stitches to blend in with the pattern.
Fill in the rest of Panel B, and repeat with Panel A.

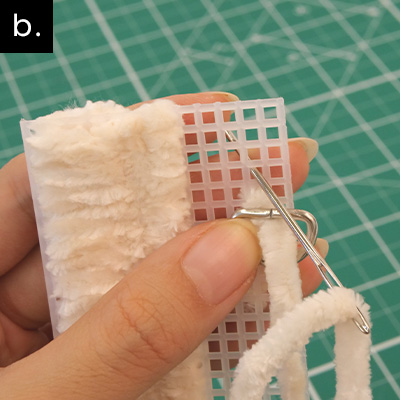
Step 8: The Strap
a. Cut a 1x10 square rectangle off each corner of the strap. This will allow for the hook end to fit onto it.
b. To begin stitching, start by inserting the needle into the fourth square down from the top left side. Stitch down the thinner part of the strap (three squares across) until you reach the wider part (five squares across). Once you get to the wider part, go down three more rows.
c. Add the D-ring.
d. Fold the thin part of the strap so the two exposed areas of the canvas line up. Stitch into the overlapping squares (3 squares across). Then, in the same row, create a stitch covering the full width of the strap (five squares across). Continue to double stitch the other two rows of overlapping canvas.
e. Repeat on the other side, and fill in the rest of the strap.

Step 8: The Strap
a. To start assembling the finished pieces, line up the bottoms of Panel A and C. Make sure the magnet clasp is on the opposite side of Panel C. Line up the centre point of Panel D with the midpoints of A and C.
b. Stitch through one layer at a time. Be sure that every stitch goes through all three layers. Incorporate the tail of the yarn as you stitch.
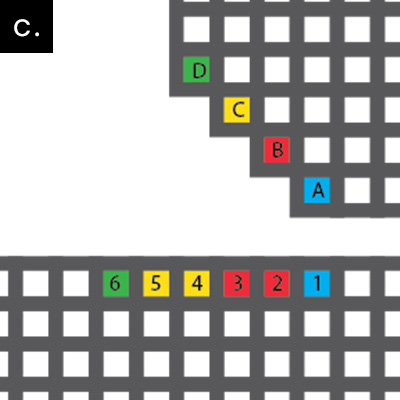
c. Once you reach the last stitch in the end of the row, refer to diagram C. Square A and Square 1 are the last stitch of the row. Square B will be stiched into twice; once when you pick up Square 2, and once when you pick up Square 3. Square C will be stiched into twice; once when you pick up Square 4, and once when you pick up Square 5. With Square D and Square 6 you can continue normally.
d. Continue to stitch up the other side of Panel A, C, and D. Then, repeat steps for Panel B and D on the front side, using steps A-C.
e. The last step is to stitch around the entire mouth of the purse. Also stitch around the outside of the strap. This will soften any rough plastic edges, and make it look polished.
Attach the strap and you’re done!


