Statement Shoulder Accessory
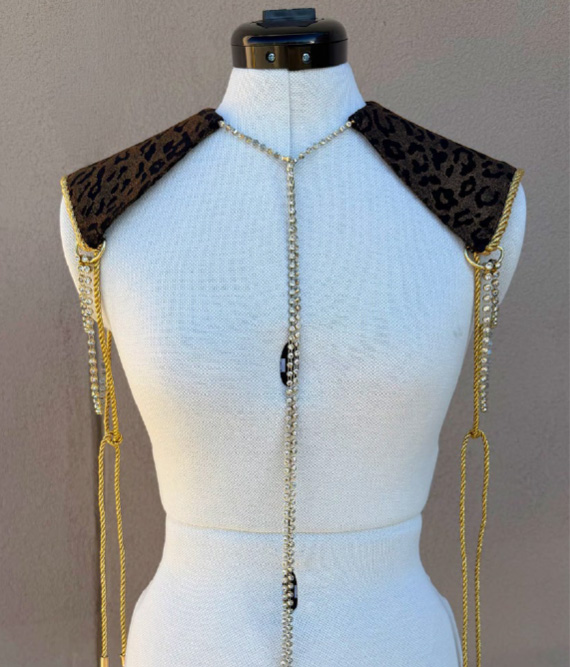
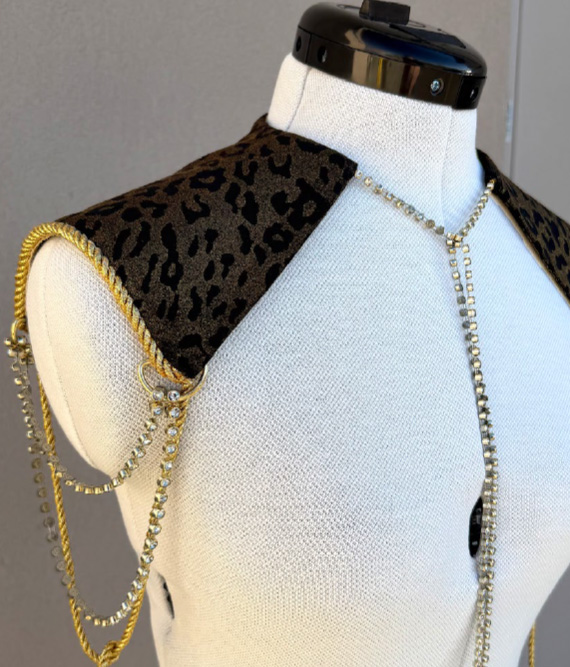
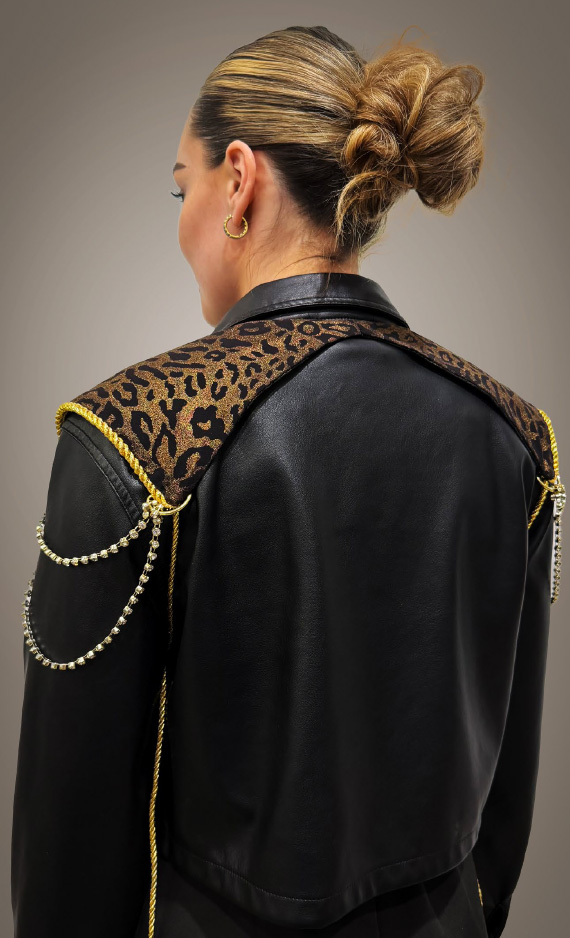
These statement shoulder pieces are giving bold, edgy, K-pop-inspired style! Pair this accessory with a leather jacket to take your look to the next level!
Difficulty Level: Easy
What you need:
Click to know more






Fabric Recommendations
- Fabric: Non-stretch fabrics are recommended.
- Interfacing: Choose a weight suitable for your fabric. Lighter fabrics may need more structure, while heavier fabrics may need less. Medium weight interfacing was used in this example.
Tips before you start
- Check the fit of the paper pattern before cutting your fabric, keeping the seam allowances in mind. Use the fitting template provided to cut and test.
- If using interfacing, test the stiffness on a fabric scrap to make sure you like the amount of structure.
- Always test your iron temperature on a scrap and use a pressing cloth when working with delicate fabrics or trims.
- If you are using a twisted cord trim for the arm ties, wrap a piece of tape around it where you want to cut it and cut down the middle of the tape to prevent the ends from separating.
Step 1 : Cut and Mark the Fabric
a. Fold your fabric in half, aligning the selvages.
b. Cut a total of 4 fabric pieces from Piece A: 2 outer pieces and 2 lining pieces.
c. Cut a total of 4 interfacing pieces from Piece A.
d. Press the interfacing to the wrong side of each piece.
e. Clip or mark all notches.
Step 2: Attach the Decorative Trim (Optional)
You can sew your trim into the seam using the steps below, or skip this section and hand-stitch decorative trim to the finished shoulder edge after the accessory is assembled.
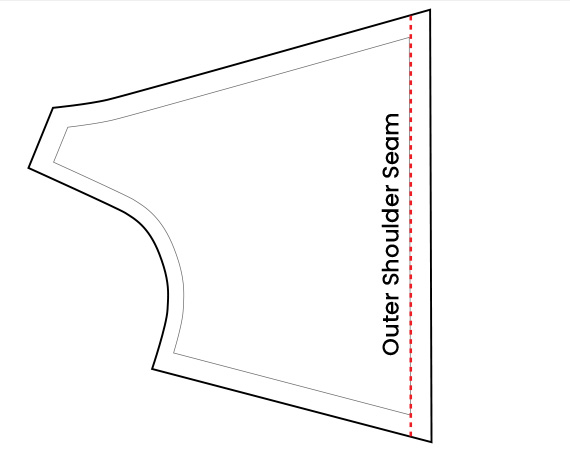
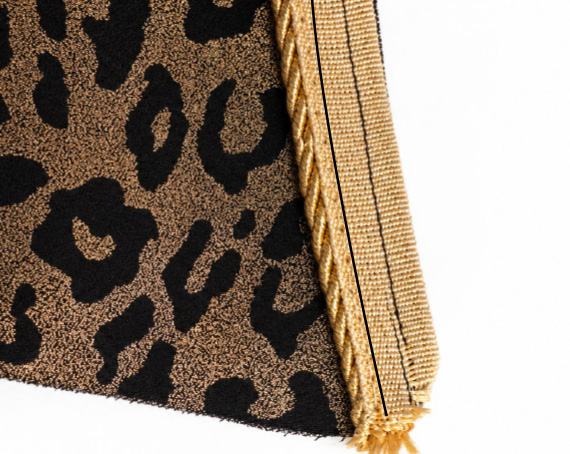
a. If adding trim, place it right side down on the right side of the outer Piece A, along the outer shoulder edge. Align the trim’s flat edge with the raw fabric edge, with the decorative portion facing inward toward the fabric. This allows the trim to extend beyond the finished edge once the piece is turned right side out.
b. Baste the trim in place within the 1/4” seam allowance, keeping the stitching away from the decorative portion.
c. If using twisted cord: Attach a zipper foot and adjust the needle position to the left. Stitch close to the cord, backstitching at both ends. You’ll sew over this stitching when assembling Piece A.
d. Repeat for the second outer Piece A.
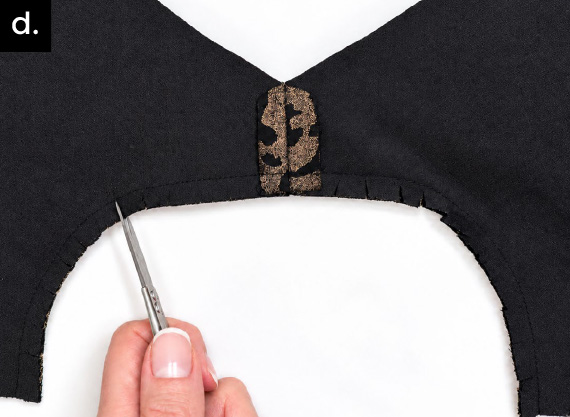
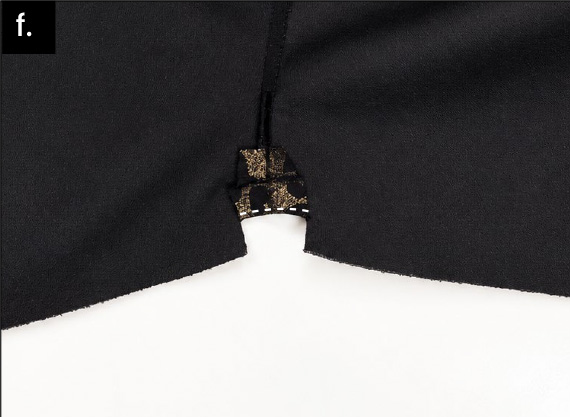
Step 4 : Assemble the Main Shoulder Piece
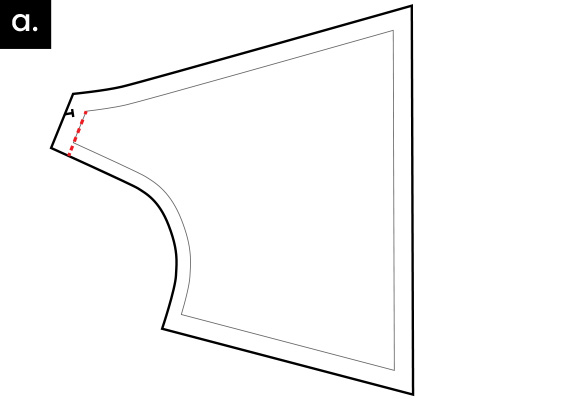
a. Sew the centre back of the outer pieces of Piece A together with a ½” seam allowance. Start at the front edge and stop 1/2” before the bottom of the centre back. Backstitch at the beginning and end. Do the same to the lining pieces.
b. At the centre-back opening, fold the remaining raw edges under 1/2” (to the wrong side), from notch D to the end, and press. Do this on both the outer fabric and lining.
c. Place outer Piece A and its lining right sides together. Pin the neckline in place.
d. Sew the neckline using a 3/8” seam allowance. Clip into the neckline seam allowance so the curve can lie smoothly, taking care not to cut through the stitching.
e. At notch C, clip into the seam allowance up to, but not through, the stitching line.
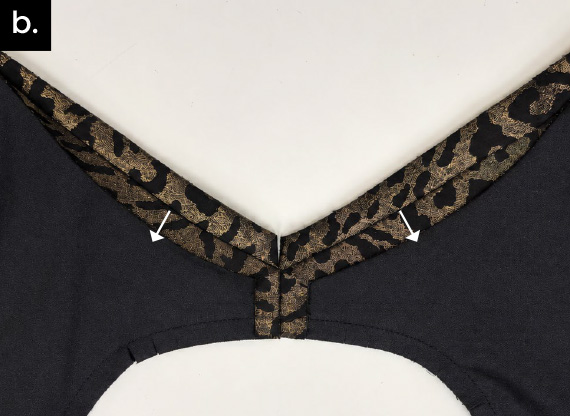
f. Open out the outer fabric and lining and press the front 1” of the neckline seam allowance open. Fold the clipped section toward the wrong side of the neckline, press, and topstitch it in place. Backstitch at both ends.
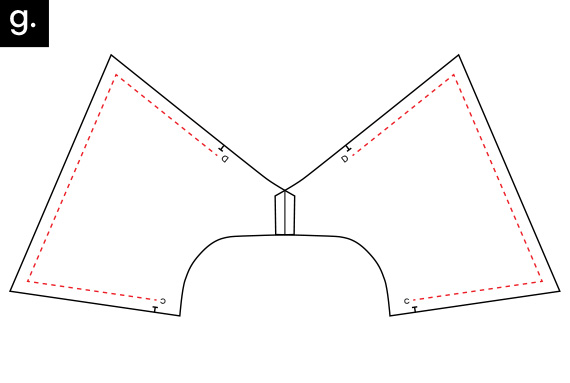
g. Sew the outer edge from notch D to notch C. If you are using twisted cord trim, attach a zipper foot and adjust the needle position so you can sew close to the cord. Start at notch D and sew continuously around the outer edge to notch C, following your previous stitching along the cord. At each corner, stop with the needle down, lift the presser foot, pivot the fabric, lower the presser foot and continue sewing with a ½” seam allowance. Backstitch at the beginning and end.
*If you are using flat trim or no trim, use your regular presser foot.
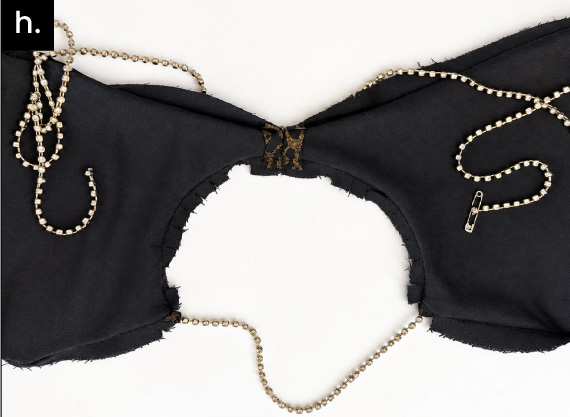
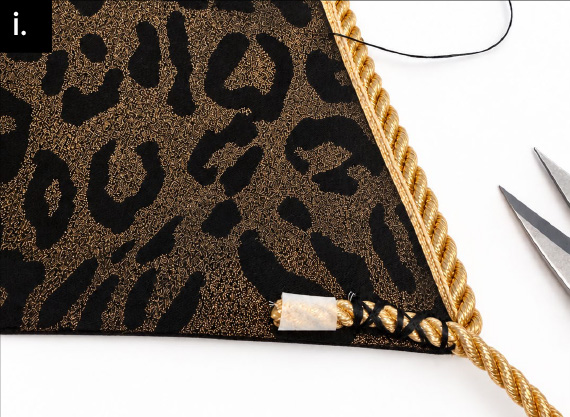
h. Feed the 63” long rhinestone neck tie through the opening at the front neckline. Attach a safety pin to an end to help guide it through the opening and out the opening at centre back.
i. Trim excess fabric from the corners without cutting the stitching. Turn the shoulder piece right side out through the centre-back opening.
j. Press carefully, using a pressing cloth if needed to protect the fabric and trim.
k. Close the centre-back opening with a ladder stitch for an invisible finish, or machine-stitch close to the folded edge.
l. Attach the arm ties. Position one end of each arm tie horizontally along the bottom edge and hand-stitch it securely to the lining. At the corner, turn the trim so it hangs straight down, in line with the outer shoulder edge.
m. Trim the excess ends of the ties close to the stitching. Apply some Fray Stop or fabric glue to the ends of the ties to prevent them from fraying if necessary.
Step 5 : Add Hanging Rhinestone Chains (Optional)
Make it your own! Add as many hanging chains as you like, or leave the shoulder piece unembellished.
Attach the Metal Rings
a. Cut a piece of 1/2” wide twill tape approximately 3” long. Fold it through a metal ring so the two ends meet.
b. Using a zipper foot, stitch the tape layers together close to the ring to form a secure loop.
c. Repeat for the remaining rings.
d. Position a loop at each outer corner of the shoulder accessory, with the ring extending below the edge.
e. Using strong polyester thread, hand-stitch the twill tape loop securely to the lining, positioning the straight side of the D-ring against the lining. Use several small backstitches or whip stitches through the twill tape and lining. Keep the stitches hidden from the front.
f. For extra security, make a few stitches over the straight side of the D-ring to hold it firmly against the lining.
Attach the Rhinestone Chains
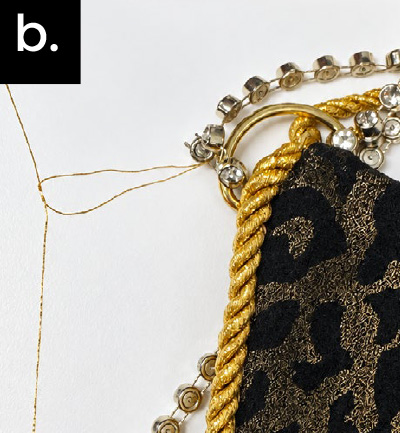
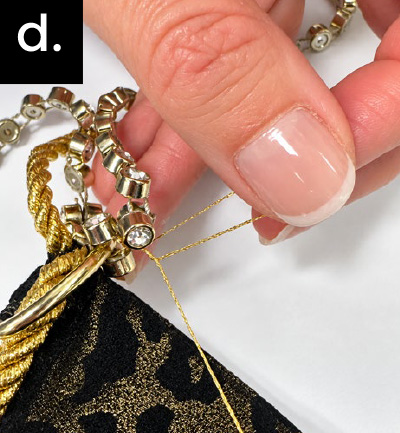
a. Feed one end of the rhinestone trim through a metal ring until two rhinestones meet, forming a small loop around the ring.
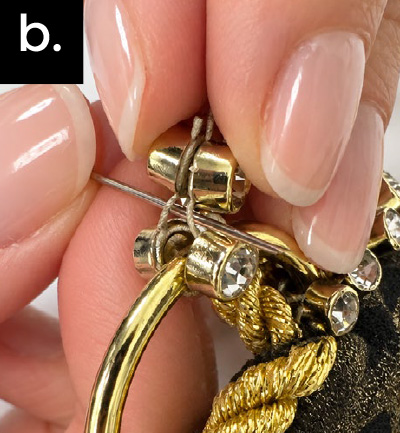
b. Thread a needle with gold thread. Pass the needle between the two overlapping rhinestones and tie a couple of knots around the joining threads to anchor it.
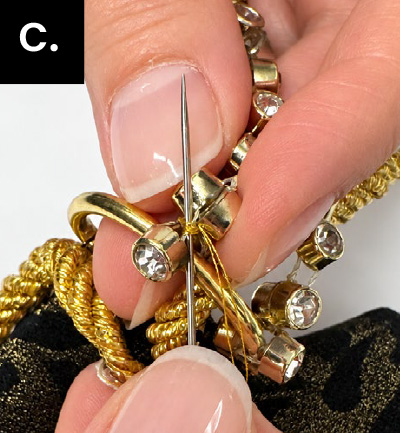
c. Wrap the gold thread in a figure-eight around the joining threads approximately 4 times, pulling snugly to secure the two sections together.
d. Pass the needle through the wrapped section and tie a couple of knots to secure.
e. Repeat at the other end of the rhinestone trim, attaching it to the next metal ring.
f. Add additional rhinestone chains as desired.
g. Apply a small amount of Gem-Tak adhesive to the wrapped joining area between the two rhinestones for extra security. Allow to dry according to the product instructions.
Glue the Cord Ends to the Cord Trim
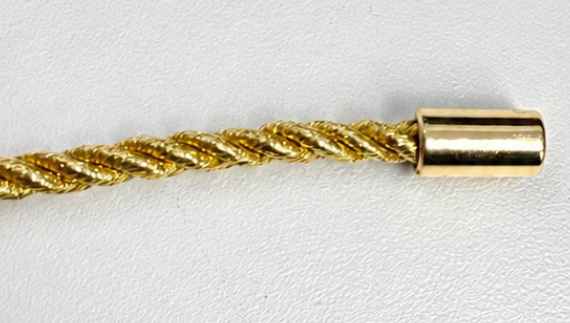
a. Use Gem-Tak to glue the ends of the hanging gold trim inside the cord ends. Allow to dry according to the product instructions.
You're Done! Try different woven fabrics and trims for different effects.