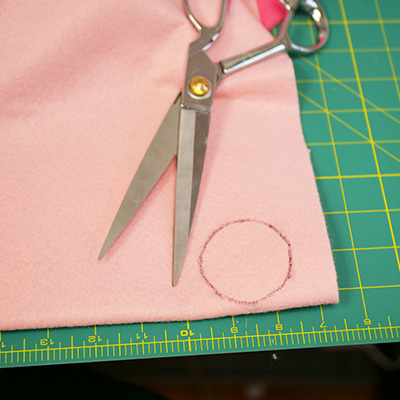
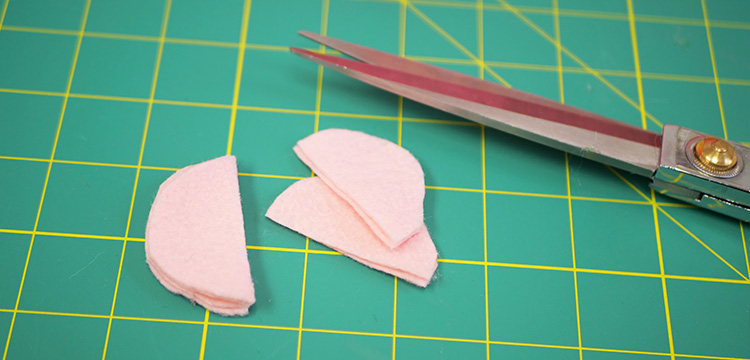
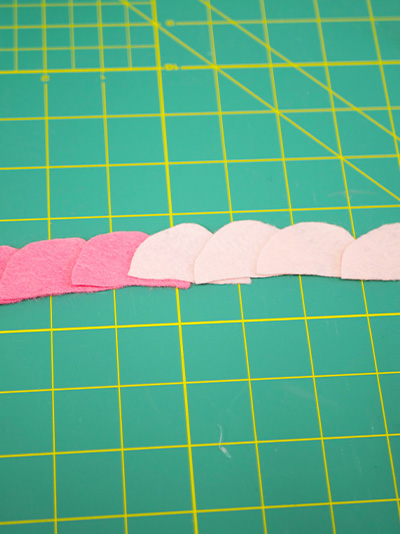
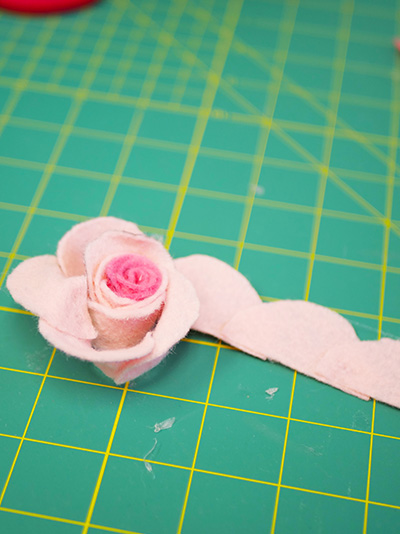
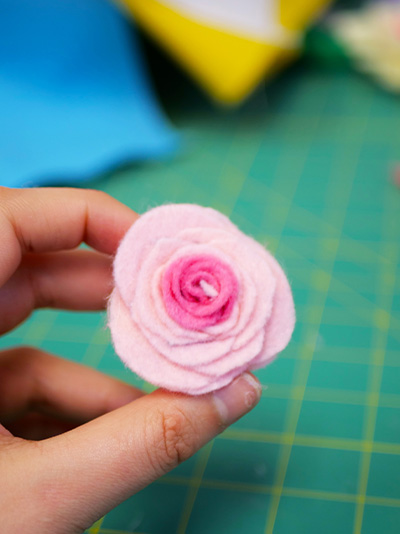
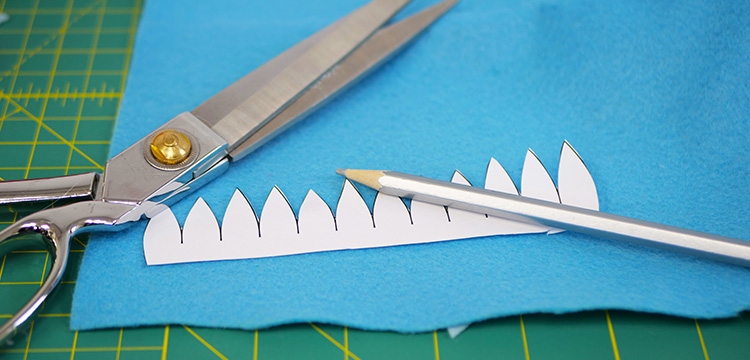
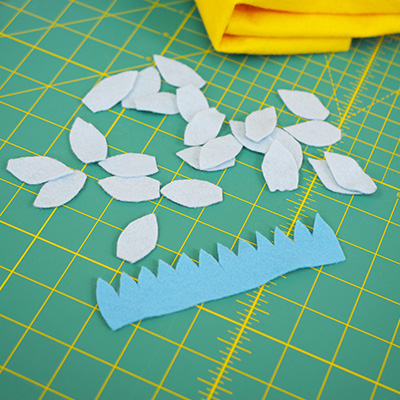
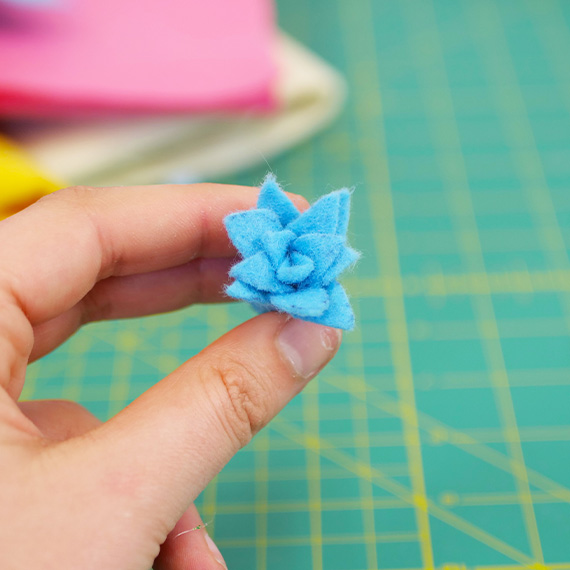
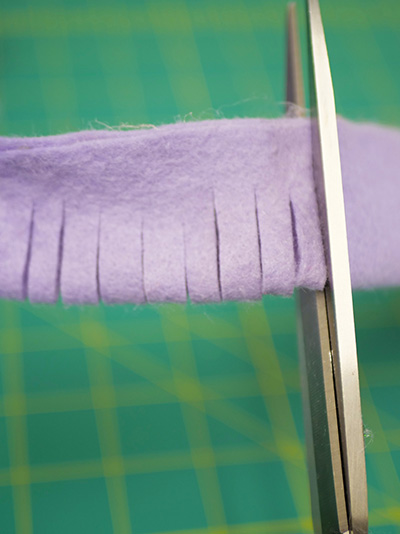
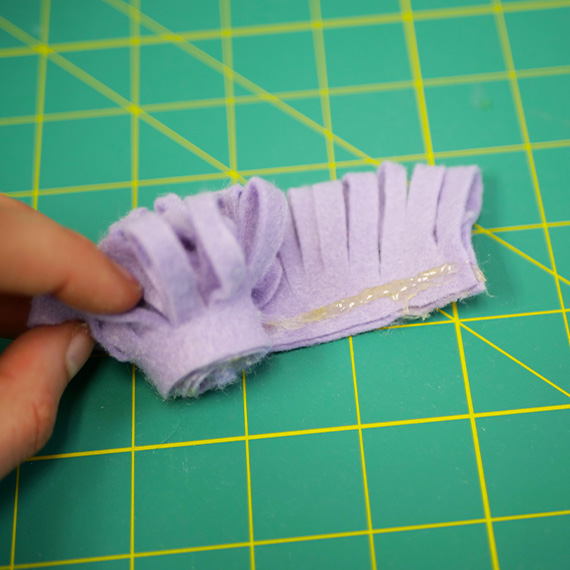
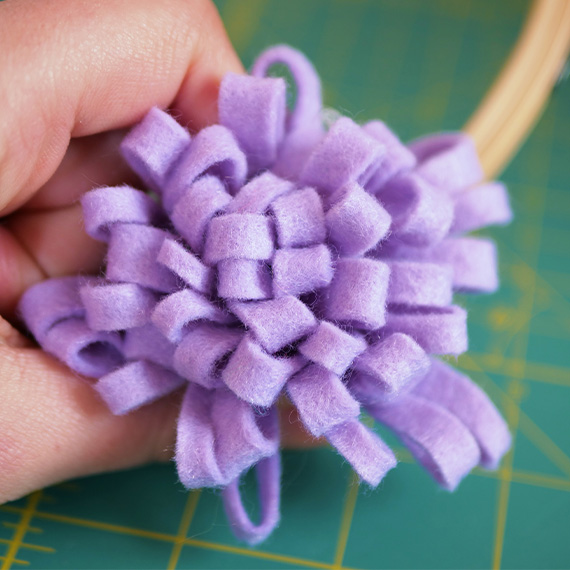
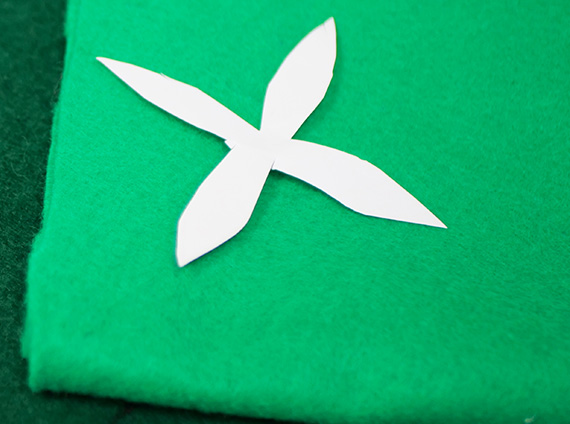
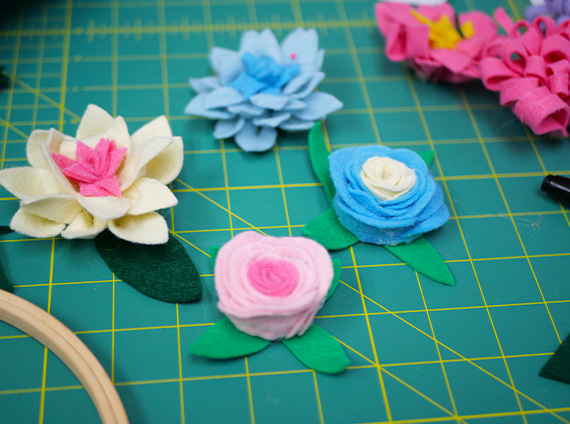
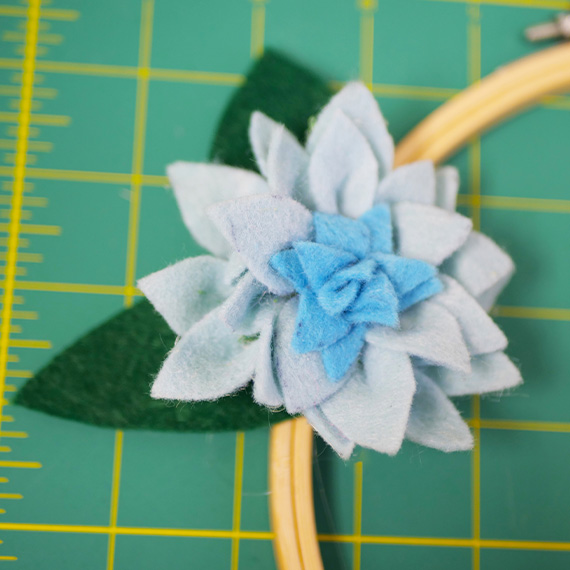
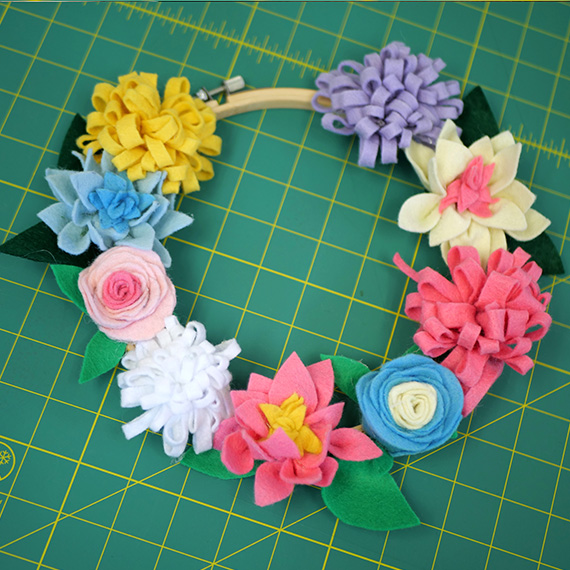
Felt Flower Wreath


e e
e

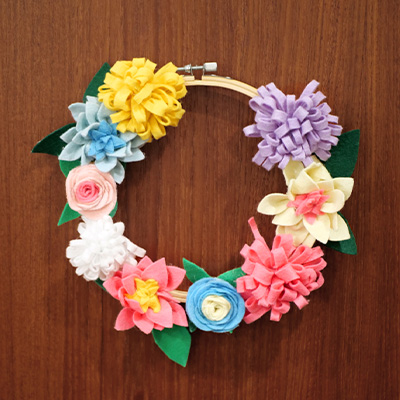
Take your spring décor to the next level with a handcrafted Felt Flower Wreath!


*Please share your creations on Facebook & Instagram. Tag Fabricland at @fabricland.canada or use the hashtag #fabriclandlove


Tips before you start

  • We recommend using bright colours for this project, to make the flowers pop! While any colours will do, the decorative leaves would look best in green shades.
  • This DIY will lead you through how to make 3 different felt flowers: Rose, Dahlia, and Chrysanthemum. It is up to you how many of each you want to make.
  • Try switching up the colours for each flower
  • You can use any sized embroidery hoop for this project. However, the bigger the hoop, the more flowers you will need to make to fill the space. This example uses an 8” embroidery hoop.
  • To fill an 8” embroidery hoop, make 3-4 of each flower, depending on the size of your flowers.
  • Nature isn’t uniform, and neither should your creations be! While the provided pattern serves as a helpful starting point, feel free to unleash your creativity by varying the sizes and number of petals for each flower. Embrace experimentation; it will enhance the beauty of your wreath.
Instructions

x
x

ROSE Step 1: Cut Pattern Pieces

a. Cut out the Rose Petal template from the provided pattern.

b. Using dressmakers chalk and the template, trace and cut out 6x Rose Petal circles from your felt.
TIP: Cut 1 or 2 circles on a darker piece of felt. This will create depth to your rose.

c. Cut all the Rose Petal circles in half. You should now have 12 semi-circles.

x
x
x

ROSE Step 2: Glue Petals Together

a. Line up all the semi-circles, overlapping slightly. If you cut out some darker felt pieces, be sure to place them at the start. Use the glue gun to glue them in place. Wait for glue to dry.

b. Starting at the darker end, roll up the petal line using hot glue along the bottom half of the petals to hold the roll in place.

c. Once glue is dry, gently fold down the petals outwardly to simulate blooming rose petals. All done!

x
x

DAHLIA Step 1: Cut Pattern Pieces

a. Cut out the Dahlia Floret and the Dahlia Petal templates from the pattern provided.

b. Using dressmakers chalk and the template, trace and cut out 16x Dahlia Petals from your felt.

c. With a different colour of felt (this example uses a colour slightly darker than the petals), trace and cut out 1x Dahlia Floret.

x
x

DAHLIA Step 2: Roll & Glue Floret

a. Take the Dahlia Floret piece and roll it tightly. Use the glue gun to glue along the bottom as you go.

b. Once the Dahlia Floret is rolled and glue has dried, gently fold down the tips outwardly.

c. Set aside for now.

x
x

DAHLIA Step 3: Fold & Glue each Dahlia Petal

a. Take a Dahlia Petal. Using the glue gun, place a drop of hot glue near the bottom flat side, and fold in half.

b. Hold in place until glue dries.

c. Repeat for all 16 Dahlia Petals.

x
x
x

DAHLIA Step 4: Glue Petals onto Floret

a. Hot glue around the base of the rolled Floret. Start placing Petals around the base of the Floret (folded side facing inwards). Hold in place until glue dries.

b. Start gluing new Petals to the backs of the Petals around the Floret, making sure to affix them at their bases.

c. Glue the remaining Petals to the flower, progressing around the flower, until all Petals are affixed.

x
x

DAHLIA Step 5: Secure Bottom & Fold Petals Down

a. Once all the Petals, are affixed, apply a thin layer of hot glue across the bottom the flower, and/or in between the outermost Petals so the flower stays secure. It’s ok if this looks messy, it won’t be visible once the wreath is finished.

b. Gently fold the petals down outwardly. All done!

x
x
x

CHRYSANTHEMUM Step 1: Cut and Fold

a. Cut out an 10” x 4” (25.4cm x 10.16 cm) sheet of felt.

b. Fold in half lengthwise.

c. Glue edges together.

d. Cut notches about 1/4” (6mm) apart from each other along the non-glued side of the felt.

x
x

CHRYSANTHEMUM Step 2: Roll & Glue

Begin rolling the felt from one end, smoothly progressing to the other. Use hot glue along the non-notched side to secure in place along the way. Hold in place while glue dries. All done!

x
x

Assembly Step 1: Cut out Leaves

a. Gather your completed flowers.

b. Cut out the Decorative Leaves templates from the pattern provided.

c. Using dressmakers chalk and the template, trace and cut out however many of each you want. These will go under your flowers on the wreath.
Tip: alternate between shades of green for the leaves.

d. Hot glue the leaves to the bottom of your flowers. The amount of leaves does not have to match the amount of flowers!

x
x

Assembly Step 2: Glue Flowers to Hoop

The final step! Collect all of your flowers. Think about how you want them arranged on the hoop. Plan it out before you glue. Once you are happy with your arrangement, use your glue gun to glue the flowers around the embroidery hoop.

If you want, you can affix string or ribbon to the top of the hoop for hanging, but it can also be hung directly on a hook.


All done!


Note: All products might not be available at all store locations. To find a suitable product alternative for your project, please ask a store team member for assistance.

More DIY Crafts

DIY of the month DIY of the month DIY of the month
Homepage

More DIY Crafts

Sales Slyer

Learn 'HowTo'

Sales Slyer

Sales Flyer

maple

PROUDLY CANADIAN

2024 © Fabricland - All Rights Reserved